> ## Documentation Index
> Fetch the complete documentation index at: https://mintlify-nick-eng-3707-update-chat-endpoints-to-single-assi.mintlify.site/llms.txt
> Use this file to discover all available pages before exploring further.
# Web editor
> Build your documentation using the Mintlify web editor
 ## Introduction
The web editor is a visual interface for creating, editing, and reviewing documentation directly in your browser.
* **Visual editing**: Make changes to your documentation using a what-you-see-is-what-you-get (WYSIWYG) editor that shows how your content will look when published.
* **Git synchronization**: All changes automatically sync with your Git repository to maintain version control.
* **Real-time collaboration**: Multiple team members can work on documentation simultaneously, with changes visible to everyone.
* **No setup required**: Start writing immediately from your dashboard.
### Web editor flow
Here is how you'll typically work in the web editor:
Create a branch or make changes directly to your deployment branch.
Navigate to an existing file or create a new one.
Make changes in the web editor using either visual mode or Markdown mode.
See how your changes will appear in visual mode.
If you're working on your deployment branch, publish your changes directly from the web editor. On other branches, publish your changes through a pull request.
## Editor modes
The web editor has two modes to accommodate different editing preferences and needs.
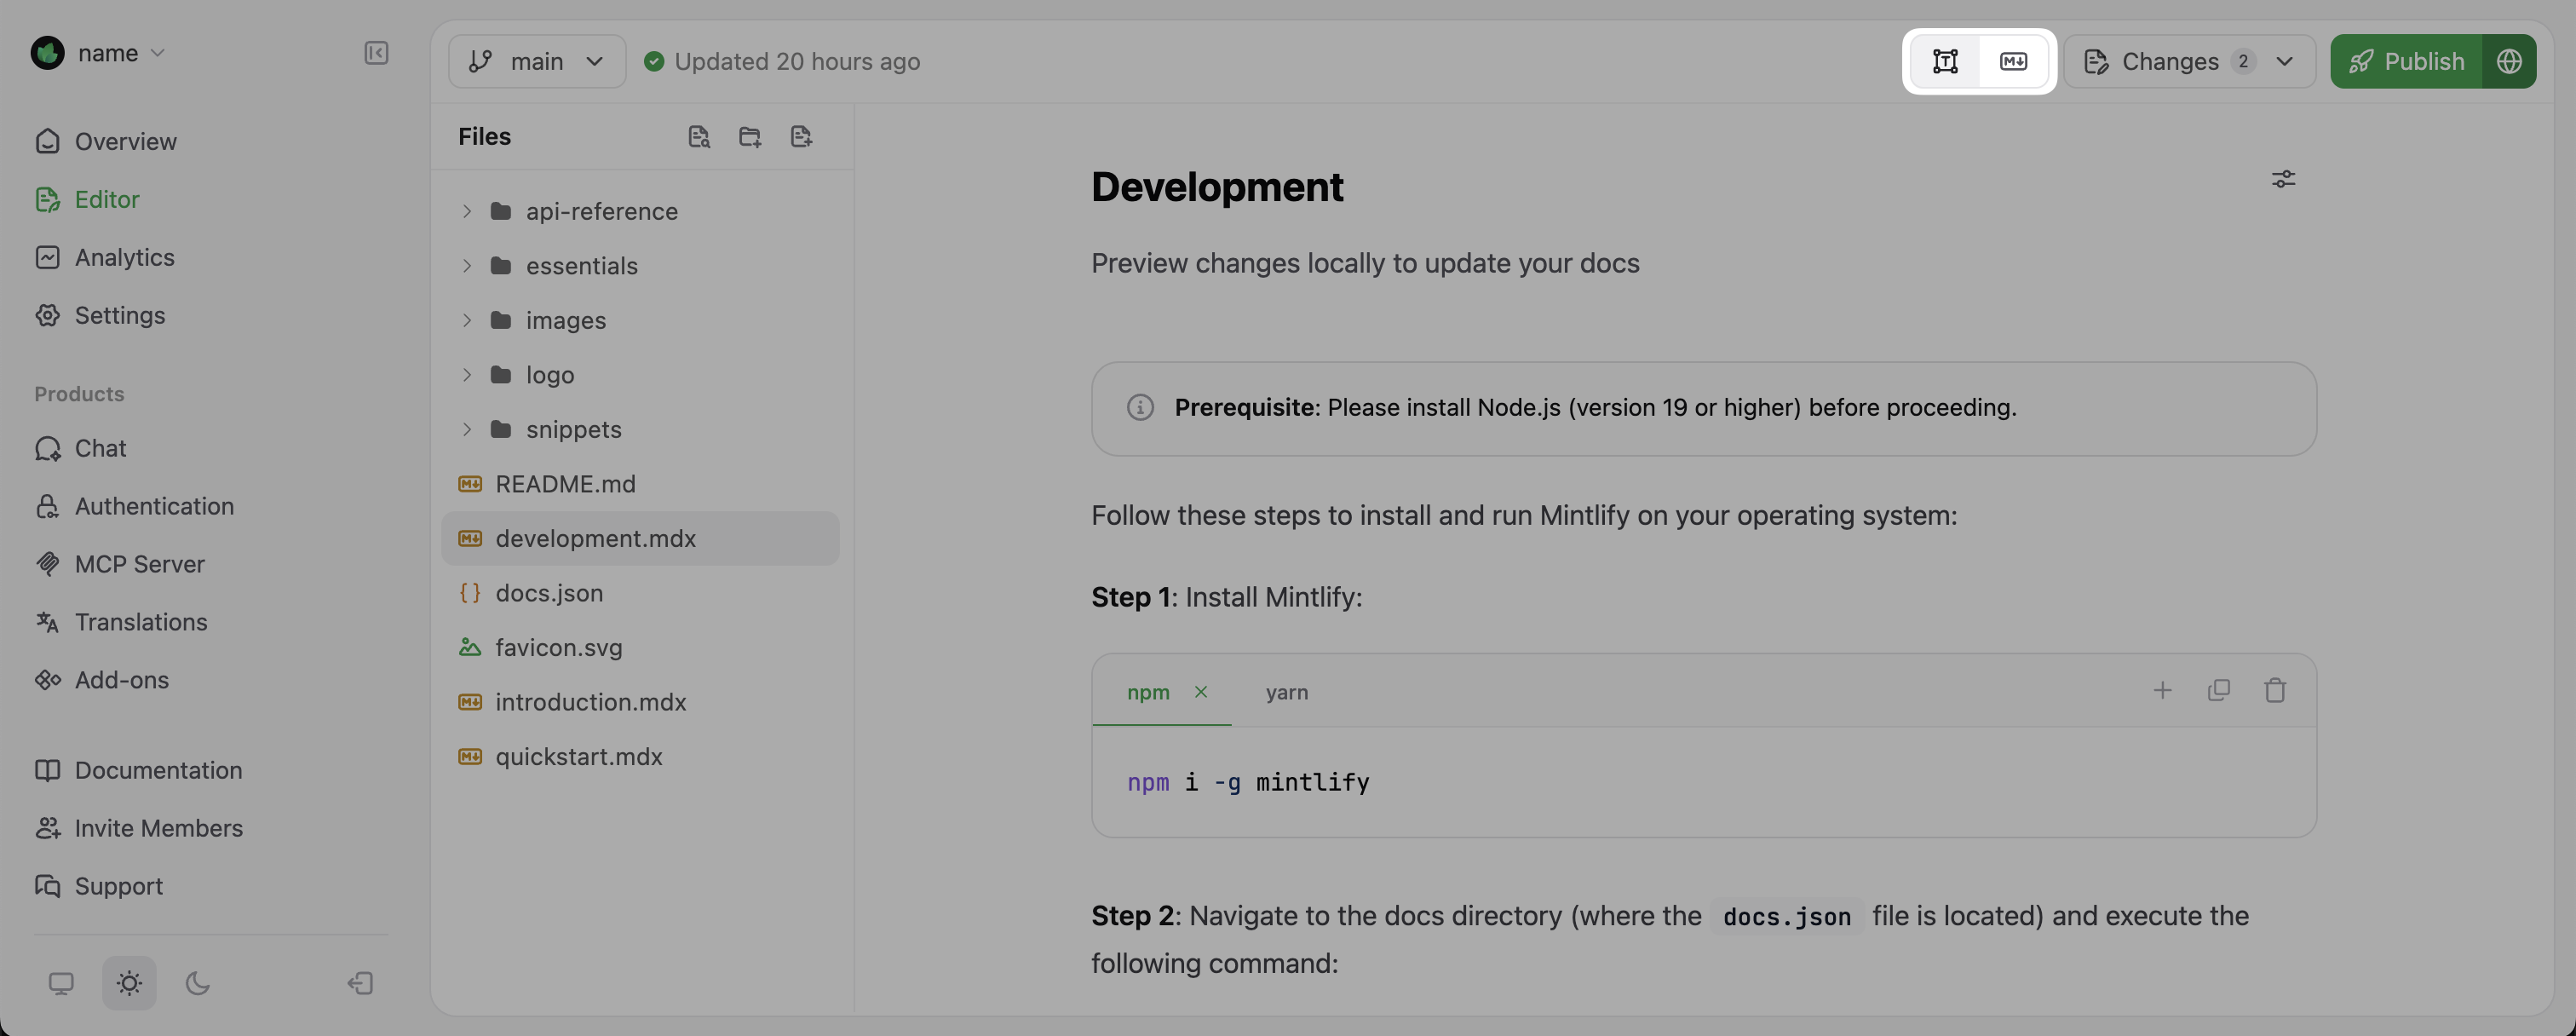
You can switch between modes at any time using the toggle in the top right corner of the editor toolbar.
## Introduction
The web editor is a visual interface for creating, editing, and reviewing documentation directly in your browser.
* **Visual editing**: Make changes to your documentation using a what-you-see-is-what-you-get (WYSIWYG) editor that shows how your content will look when published.
* **Git synchronization**: All changes automatically sync with your Git repository to maintain version control.
* **Real-time collaboration**: Multiple team members can work on documentation simultaneously, with changes visible to everyone.
* **No setup required**: Start writing immediately from your dashboard.
### Web editor flow
Here is how you'll typically work in the web editor:
Create a branch or make changes directly to your deployment branch.
Navigate to an existing file or create a new one.
Make changes in the web editor using either visual mode or Markdown mode.
See how your changes will appear in visual mode.
If you're working on your deployment branch, publish your changes directly from the web editor. On other branches, publish your changes through a pull request.
## Editor modes
The web editor has two modes to accommodate different editing preferences and needs.
You can switch between modes at any time using the toggle in the top right corner of the editor toolbar.
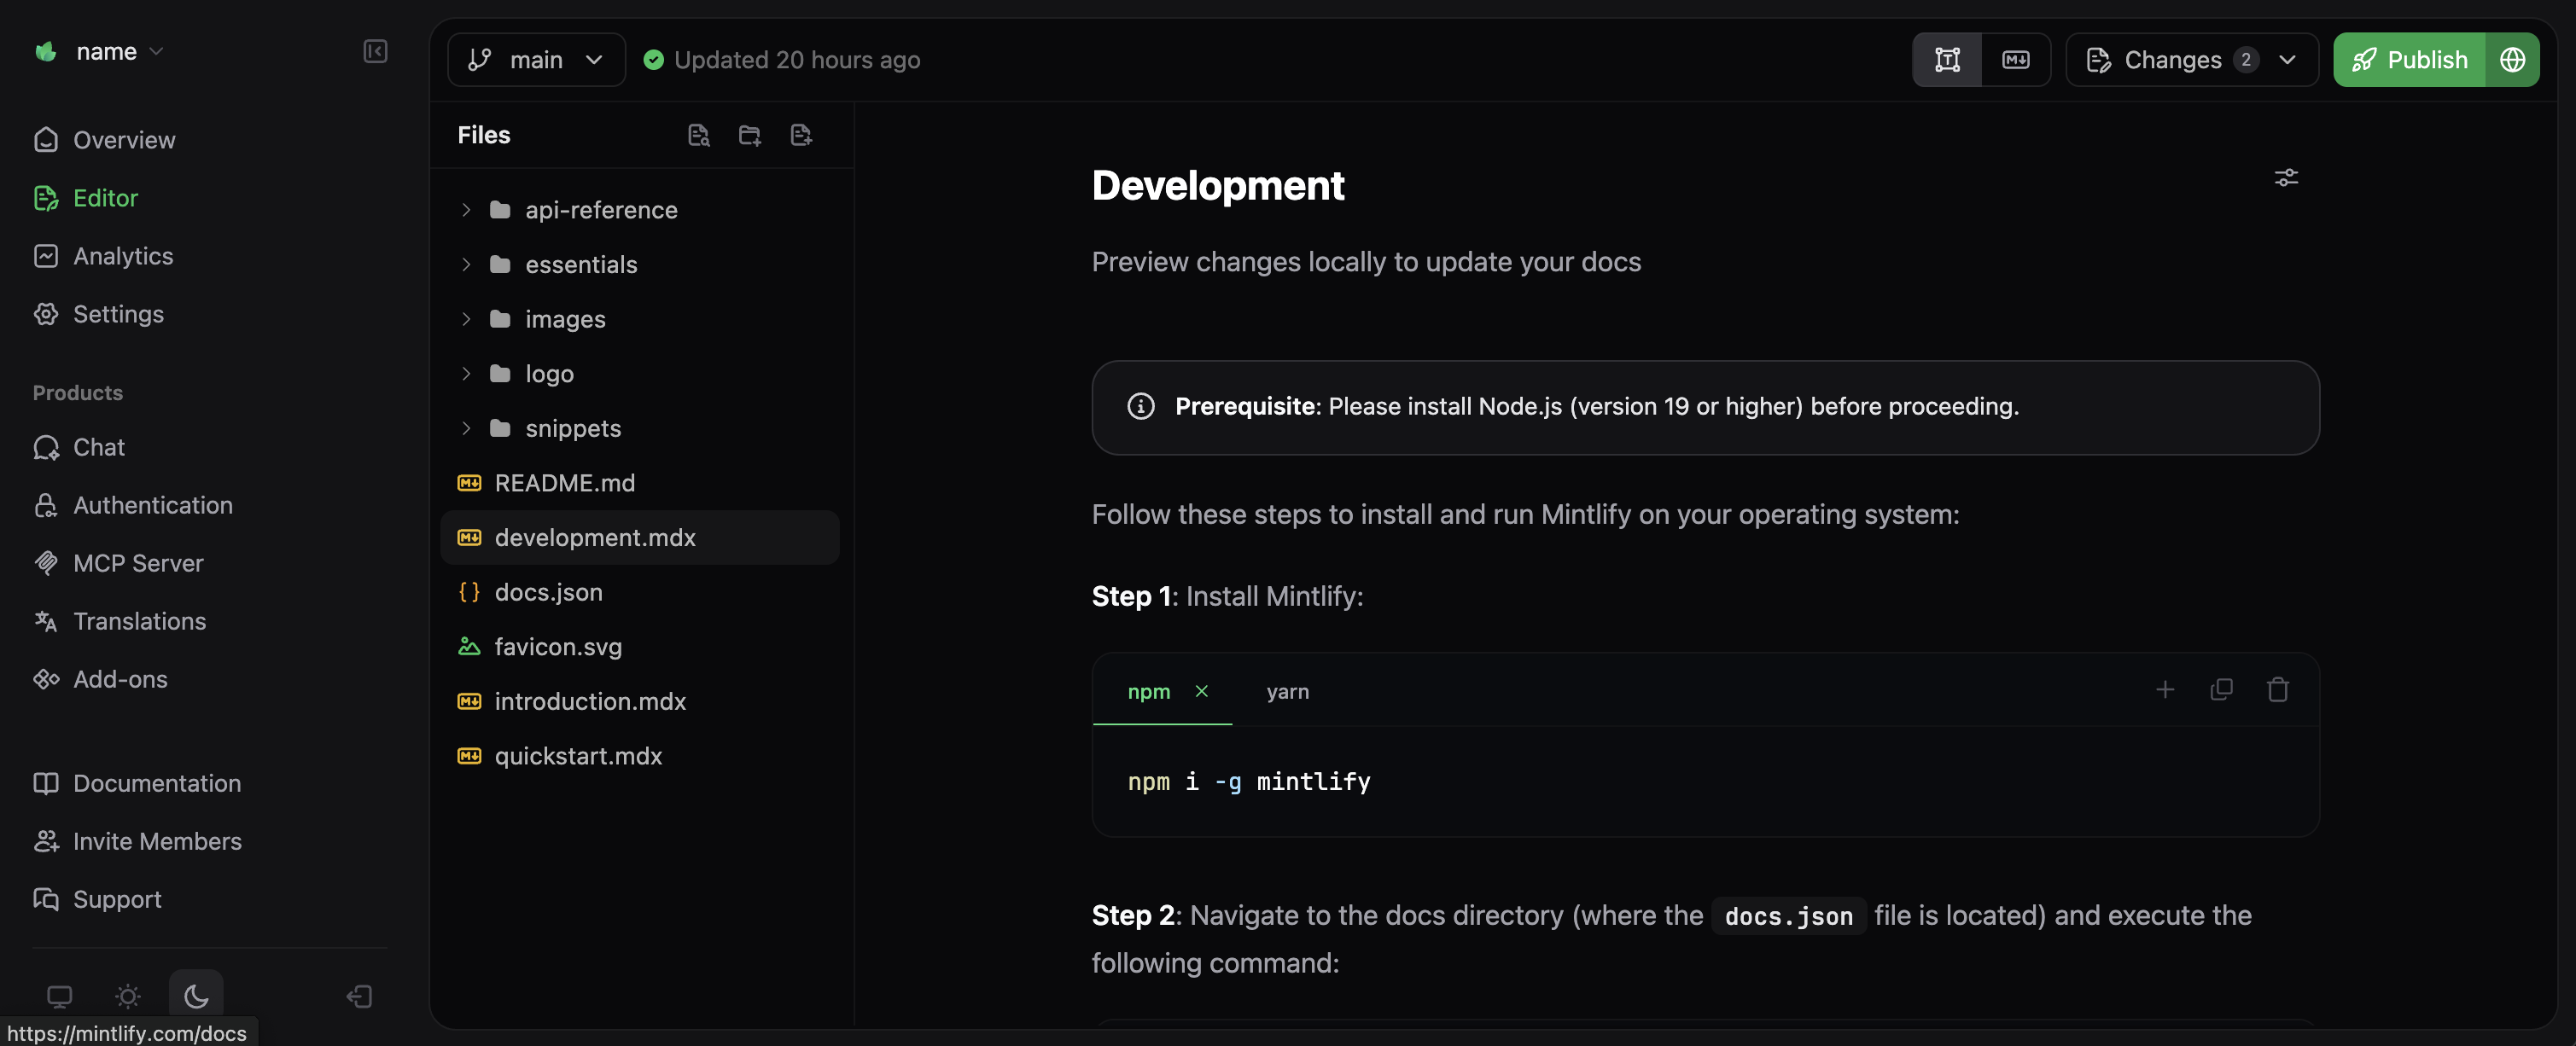
 ### Visual mode
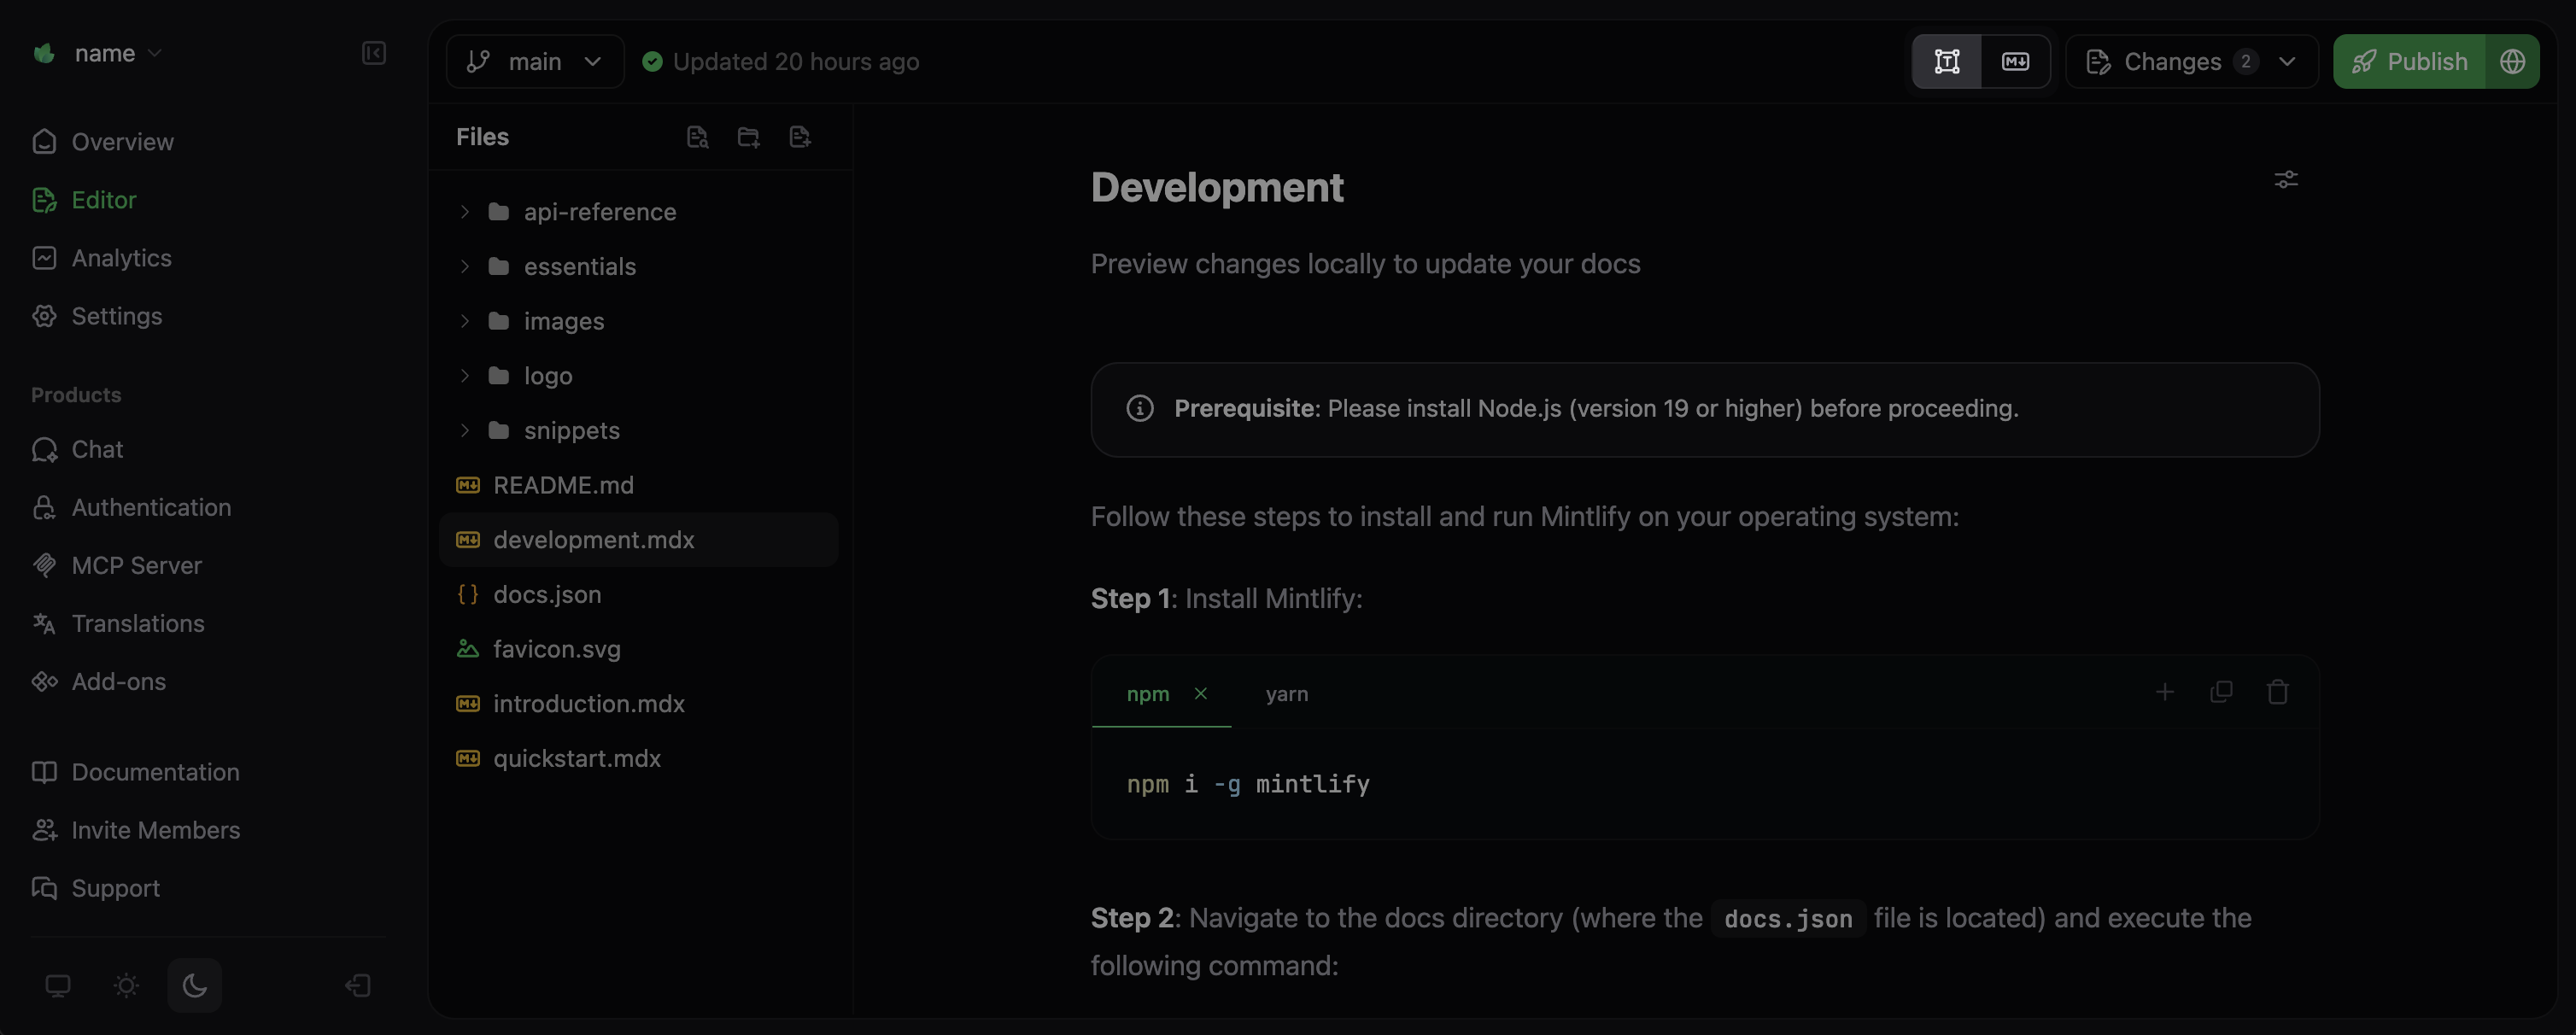
Visual mode provides a WYSIWYG experience where the changes that you make in the editor are the changes that will be published to your documentation site. This mode is ideal for when you want to see how your changes will look in real-time.
### Visual mode
Visual mode provides a WYSIWYG experience where the changes that you make in the editor are the changes that will be published to your documentation site. This mode is ideal for when you want to see how your changes will look in real-time.
 ### Markdown mode
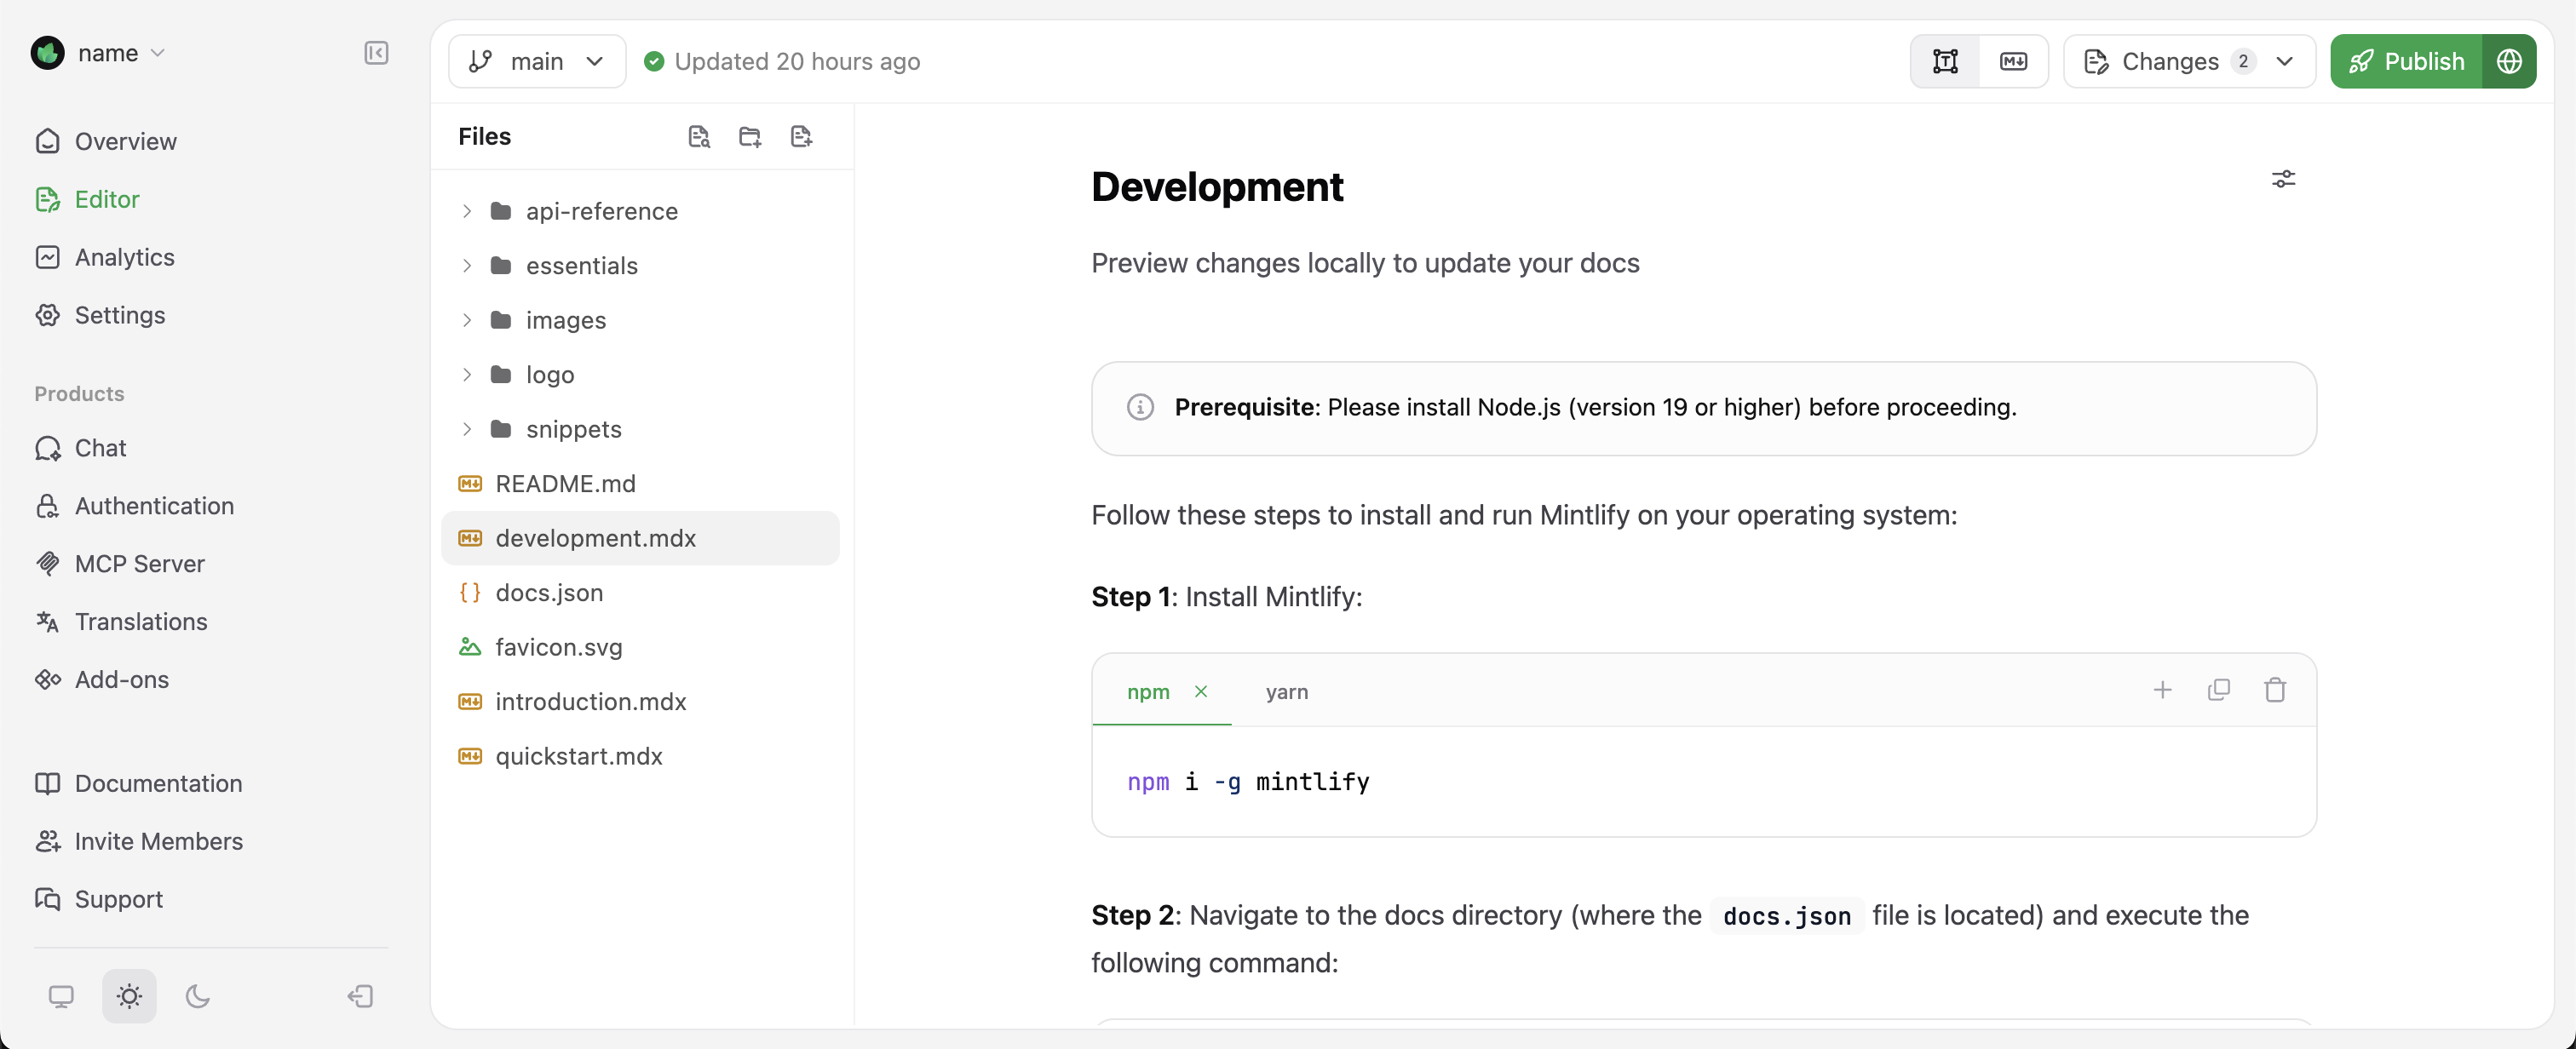
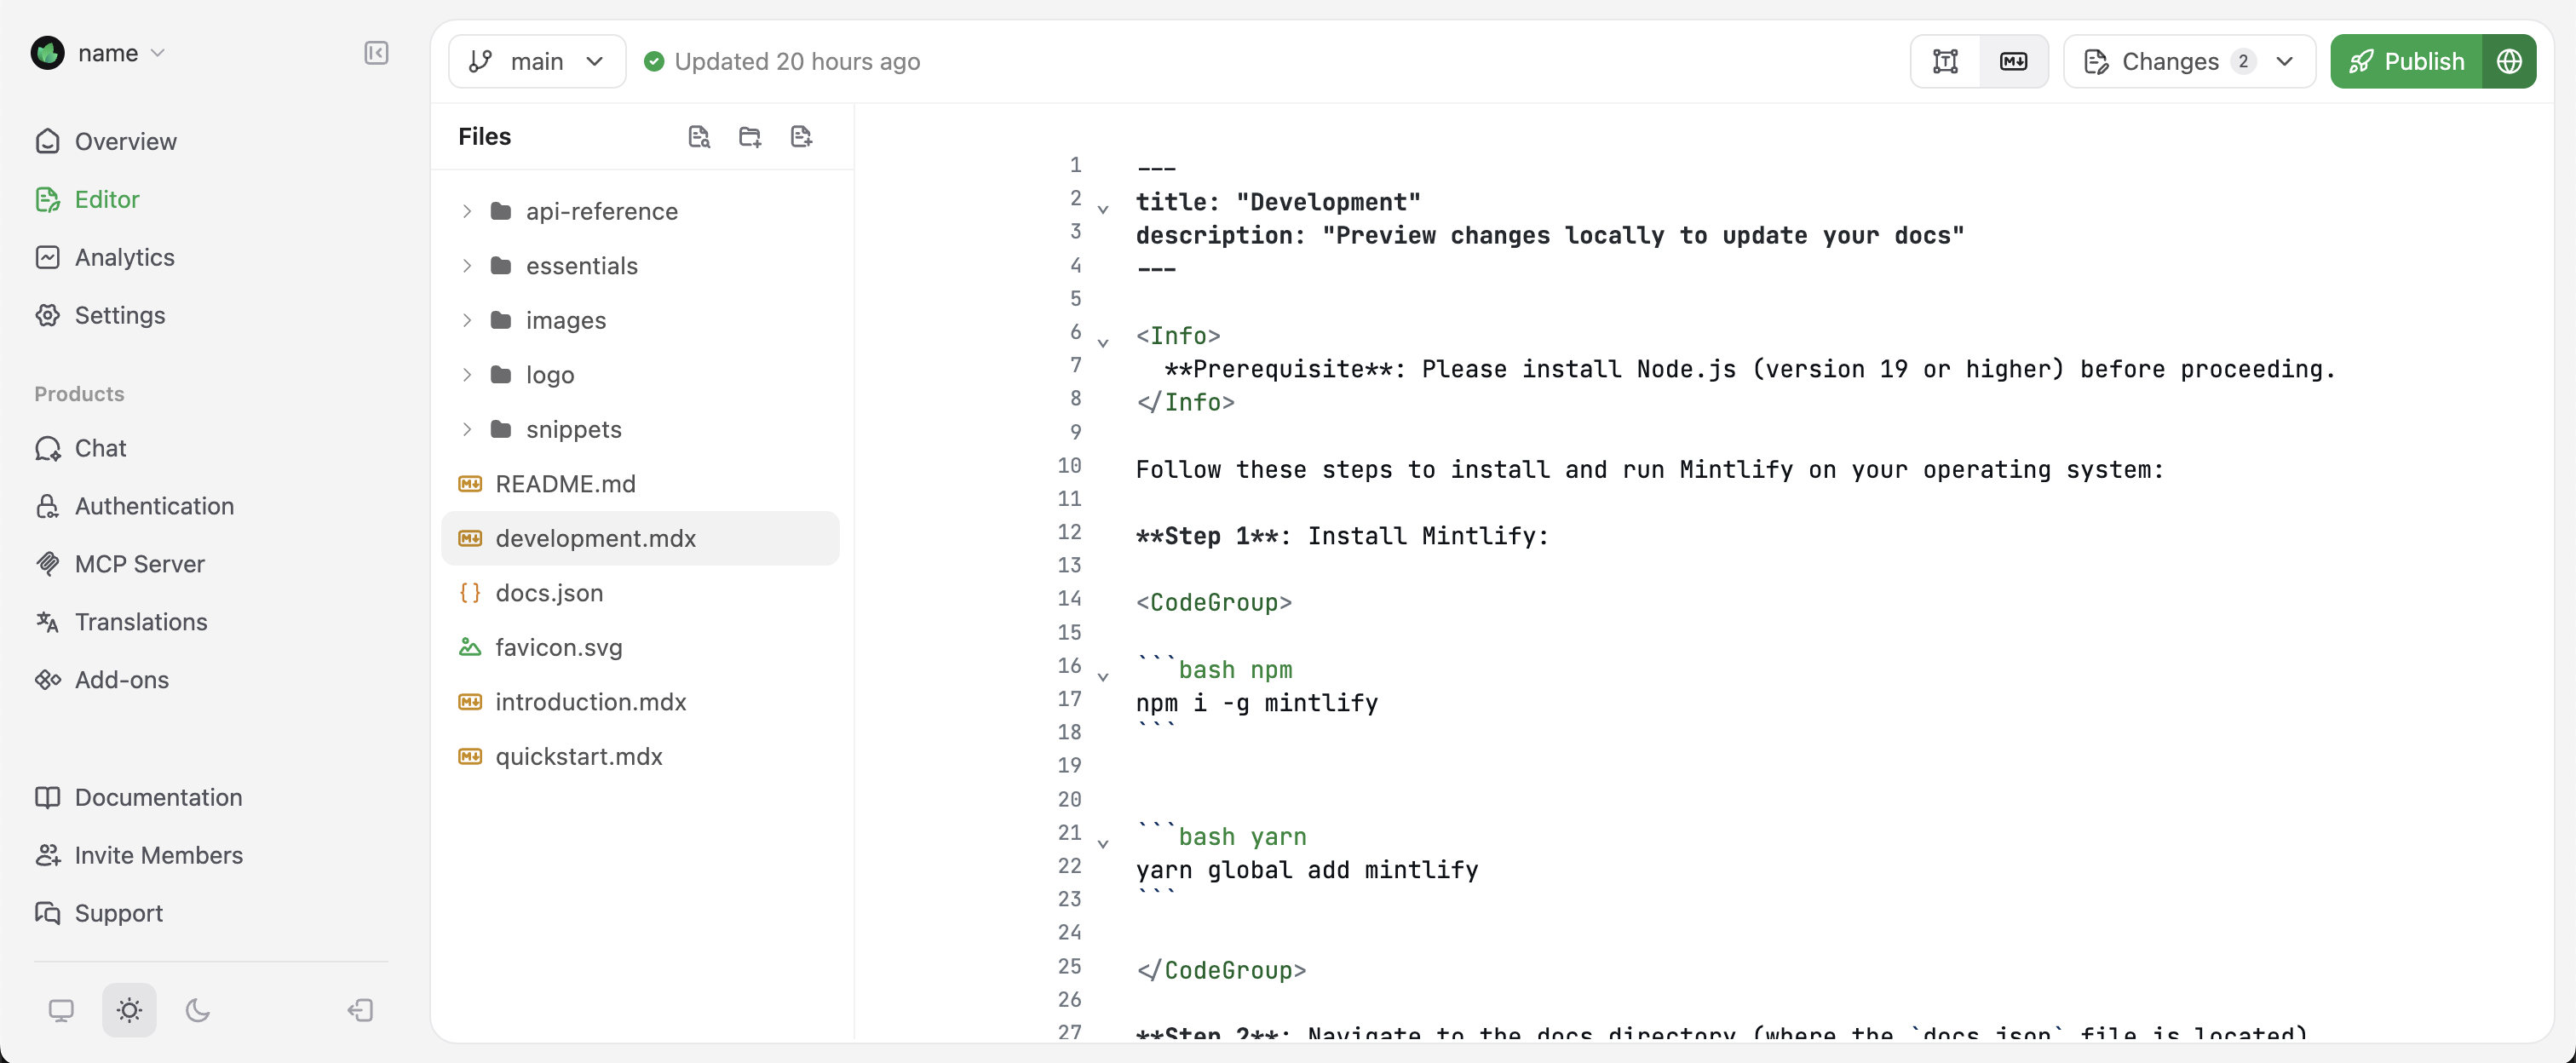
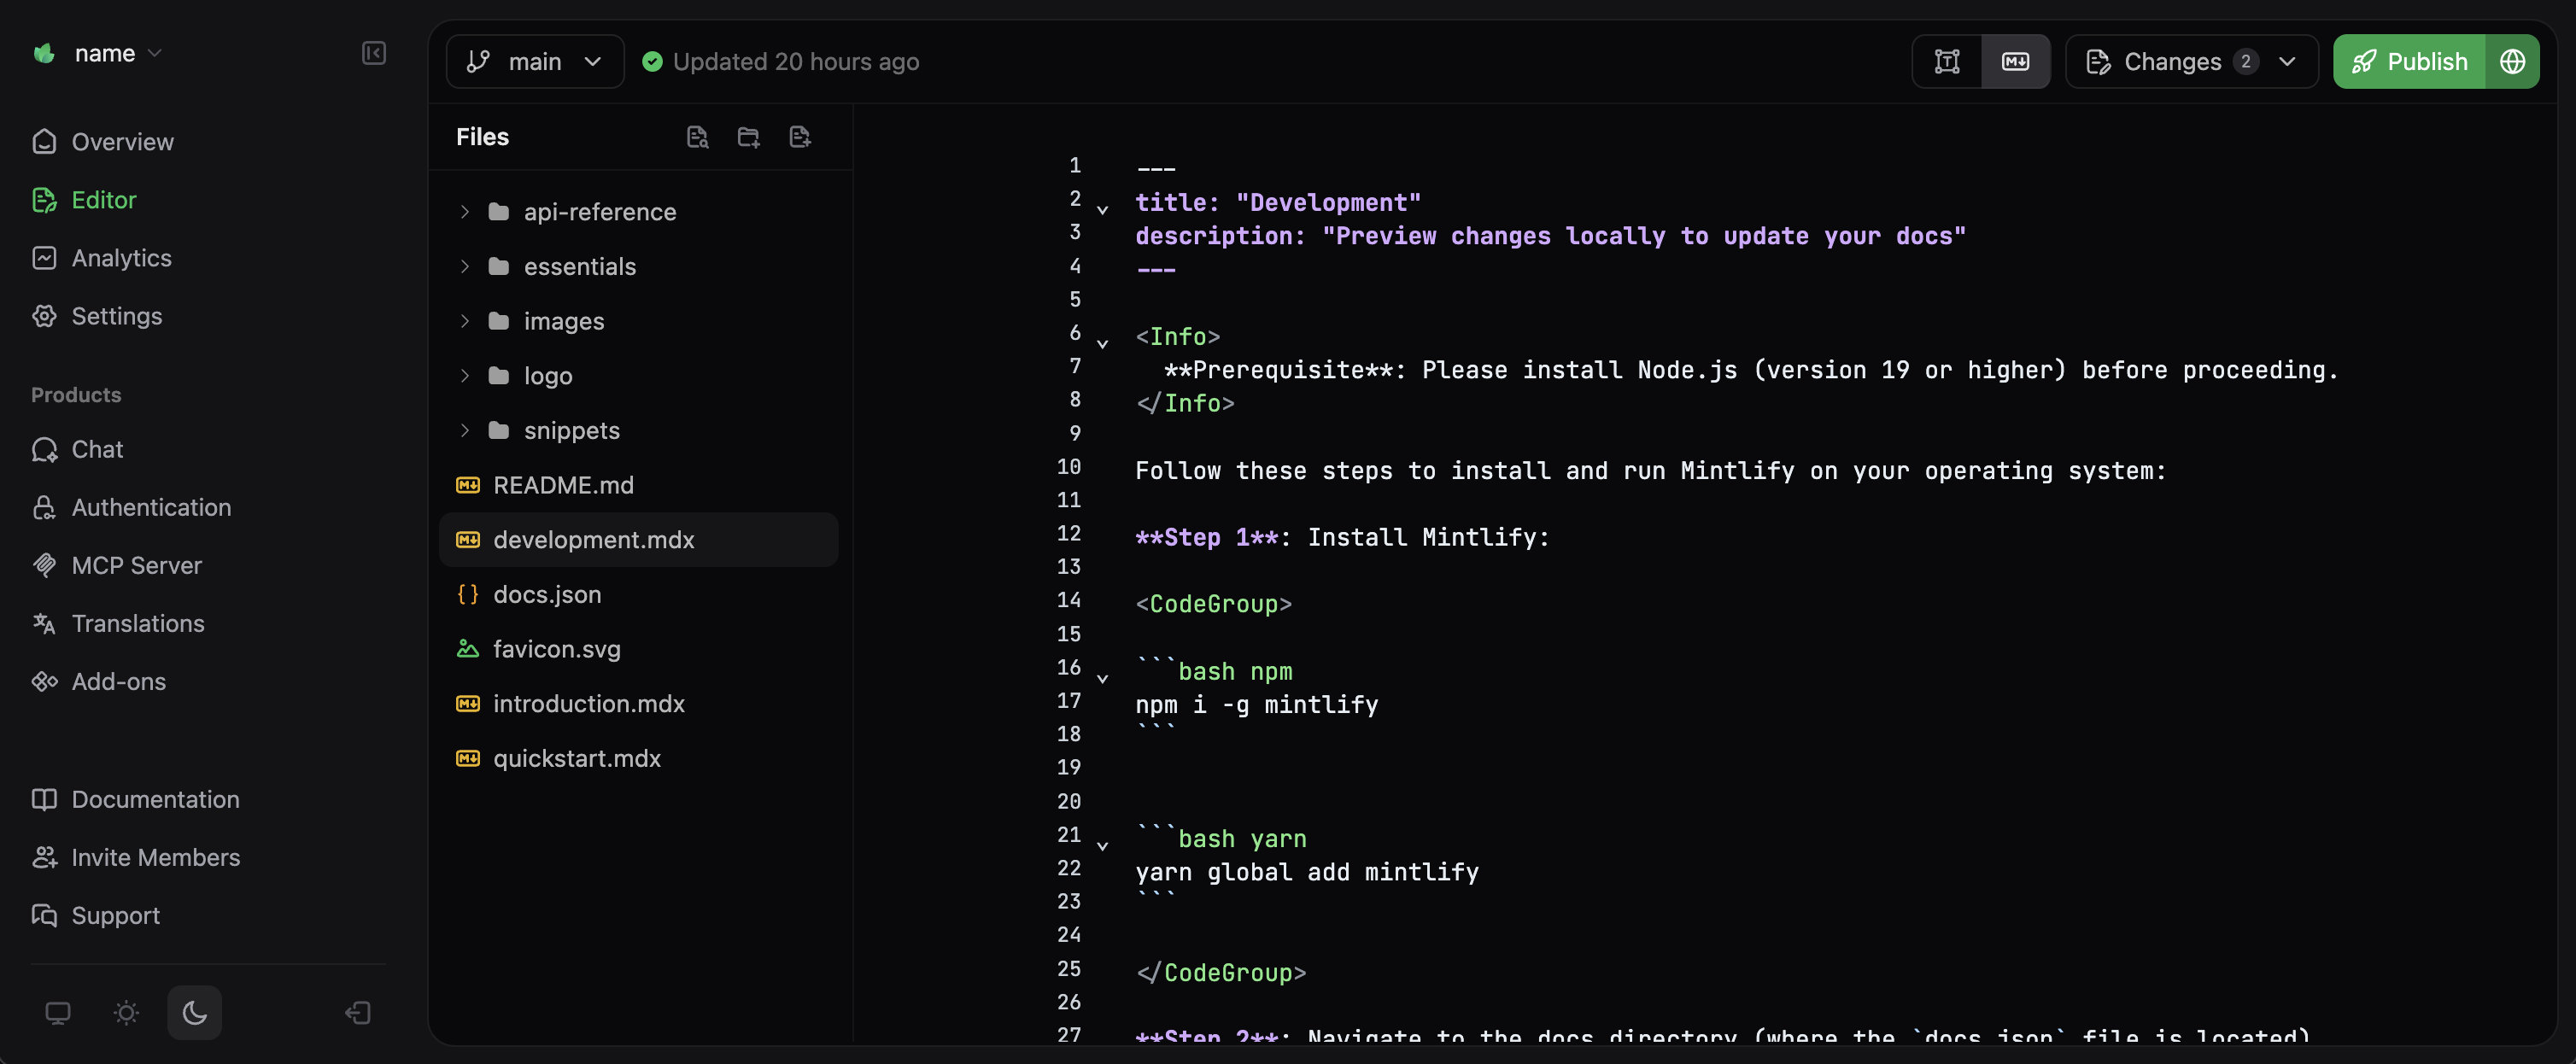
Markdown mode provides direct access to the underlying `MDX` code of your documentation. `MDX` combines Markdown syntax with React components, giving you full control over your content structure. This mode is ideal for when you need precise control over component properties or when you prefer to write in Markdown syntax.
### Markdown mode
Markdown mode provides direct access to the underlying `MDX` code of your documentation. `MDX` combines Markdown syntax with React components, giving you full control over your content structure. This mode is ideal for when you need precise control over component properties or when you prefer to write in Markdown syntax.
 ## Git fundamentals
The web editor performs Git operations behind the scenes. Understanding these concepts will help you work more effectively with the web editor and collaborate with team members who are working in their local environments.
Your documentation's source where all files and their history are stored. The web editor connects to your repository to access and modify content.
A saved snapshot of your changes at a specific point in time.
A separate workspace for making changes without affecting your live documentation. Think of it as a safe sandbox for experiments and larger updates.
The main branch that contains your live documentation content. Changes to this branch are automatically published to your documentation site. Often called `main`.
A way to propose merging your branch changes into your live documentation. Allows for review and discussion before changes go live. Commonly called a PR.
A diff (or difference) shows the specific changes between two versions of a file. When reviewing pull requests, diffs highlight what has been added, removed, or modified.
### What the web editor automates
The web editor connects to your Git repository through our [GitHub App](/settings/github) or [GitLab integration](/settings/gitlab) and handles Git automatically. When you:
* **Open a file**: Fetches the latest version from your repository.
* **Make changes in a file**: Tracks your changes as a draft that can become a commit.
* **Save changes**: Creates a commit with your changes.
* **Create a branch**: Creates a new branch in your repository.
* **Publish on your deployment branch**: Creates a commit and pushes directly to your deployment branch.
* **Publish on other branches**: Creates a commit and opens a pull request.
### When to use branches
Branches let you work on changes without affecting the content on your live site. When your changes are ready, you can merge them into your deployment branch with a pull request.
**Best practice: Always work from branches.** This ensures your live documentation stays stable and enables proper review workflows.
## Creating a branch
1. Select the branch name in the editor toolbar (usually `main` by default).
2. Select **New Branch**.
3. Enter a descriptive name for your branch like `update-getting-started` or `fix-installation-steps`.
4. Select **Create Branch**.
You may need to select your new branch from the dropdown menu if the editor does not automatically switch to it.
### Saving changes on a branch
To save your changes on a branch, select the **Save Changes** button in the top-right corner of the editor. This creates a commit with your changes and pushes it to your branch.
### Switching branches
1. Select the current branch name in the editor toolbar.
2. Select the branch you want to switch to from the dropdown menu.
Any unsaved changes will be lost when switching branches. Make sure to save or publish your work before switching.
## Making changes
Edit existing content, create new pages, and organize your site structure in the web editor.
### Navigating files
Use the sidebar file explorer to browse your documentation, or press Command + P (Ctrl + P on Windows) to search for files.
### Editing content
Make changes to your pages using visual mode or Markdown mode.
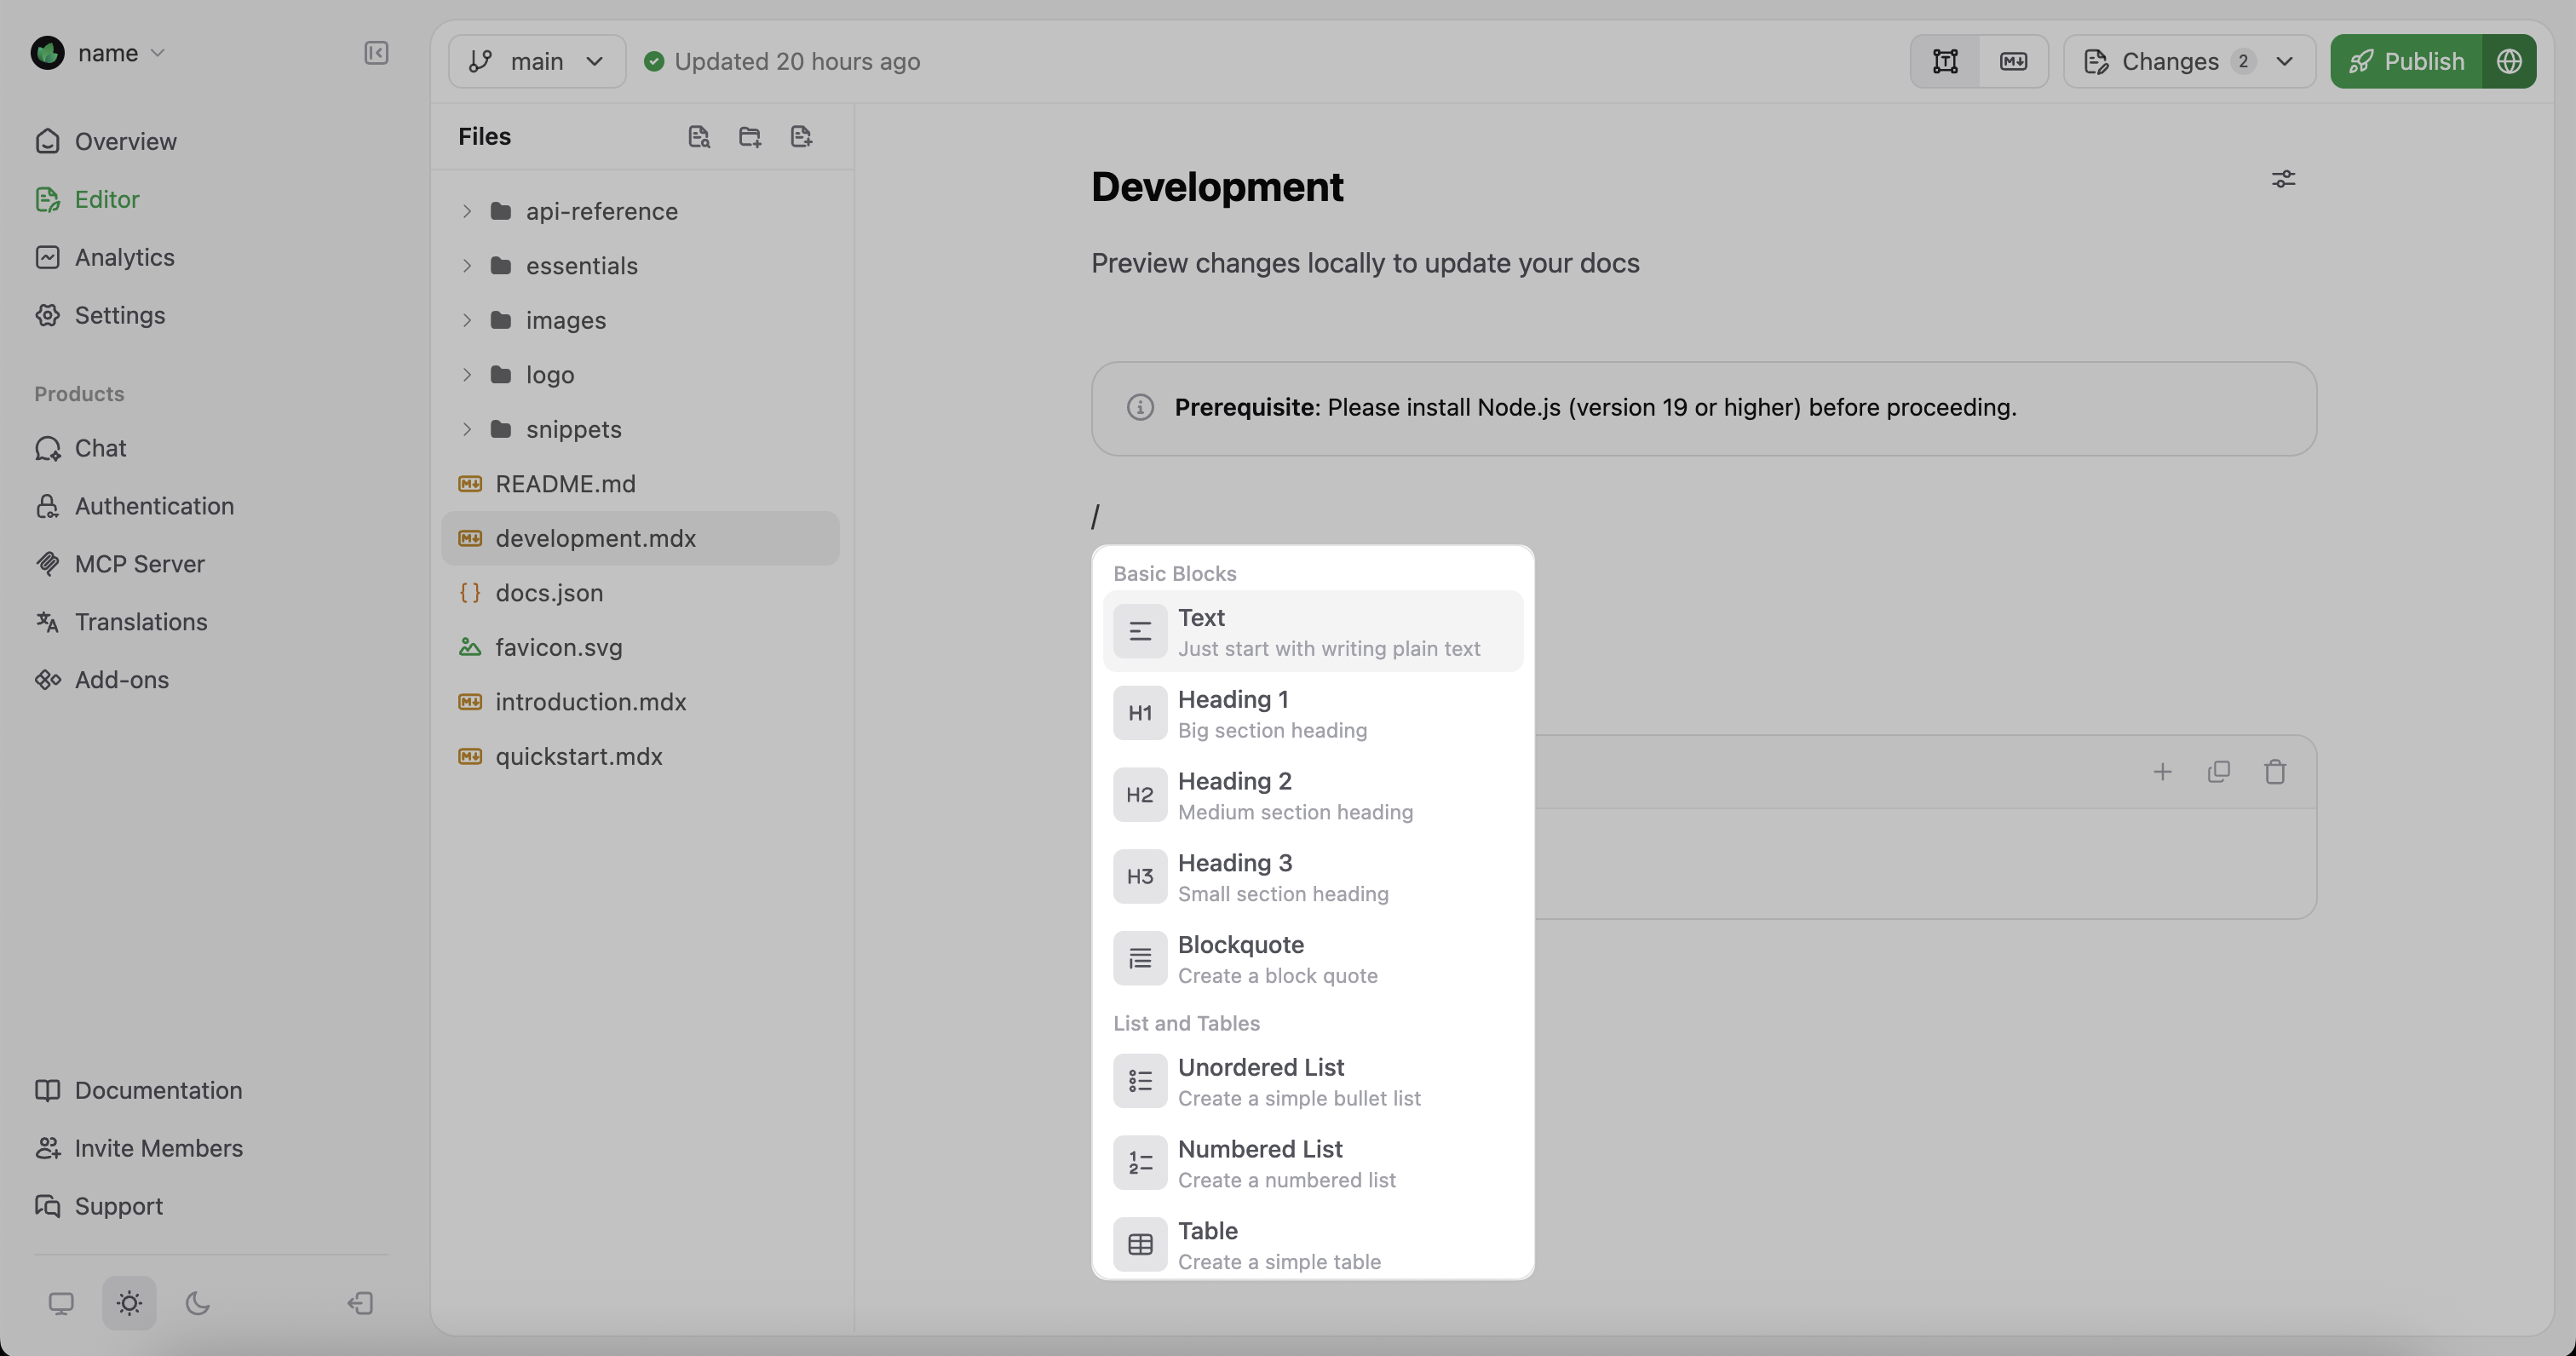
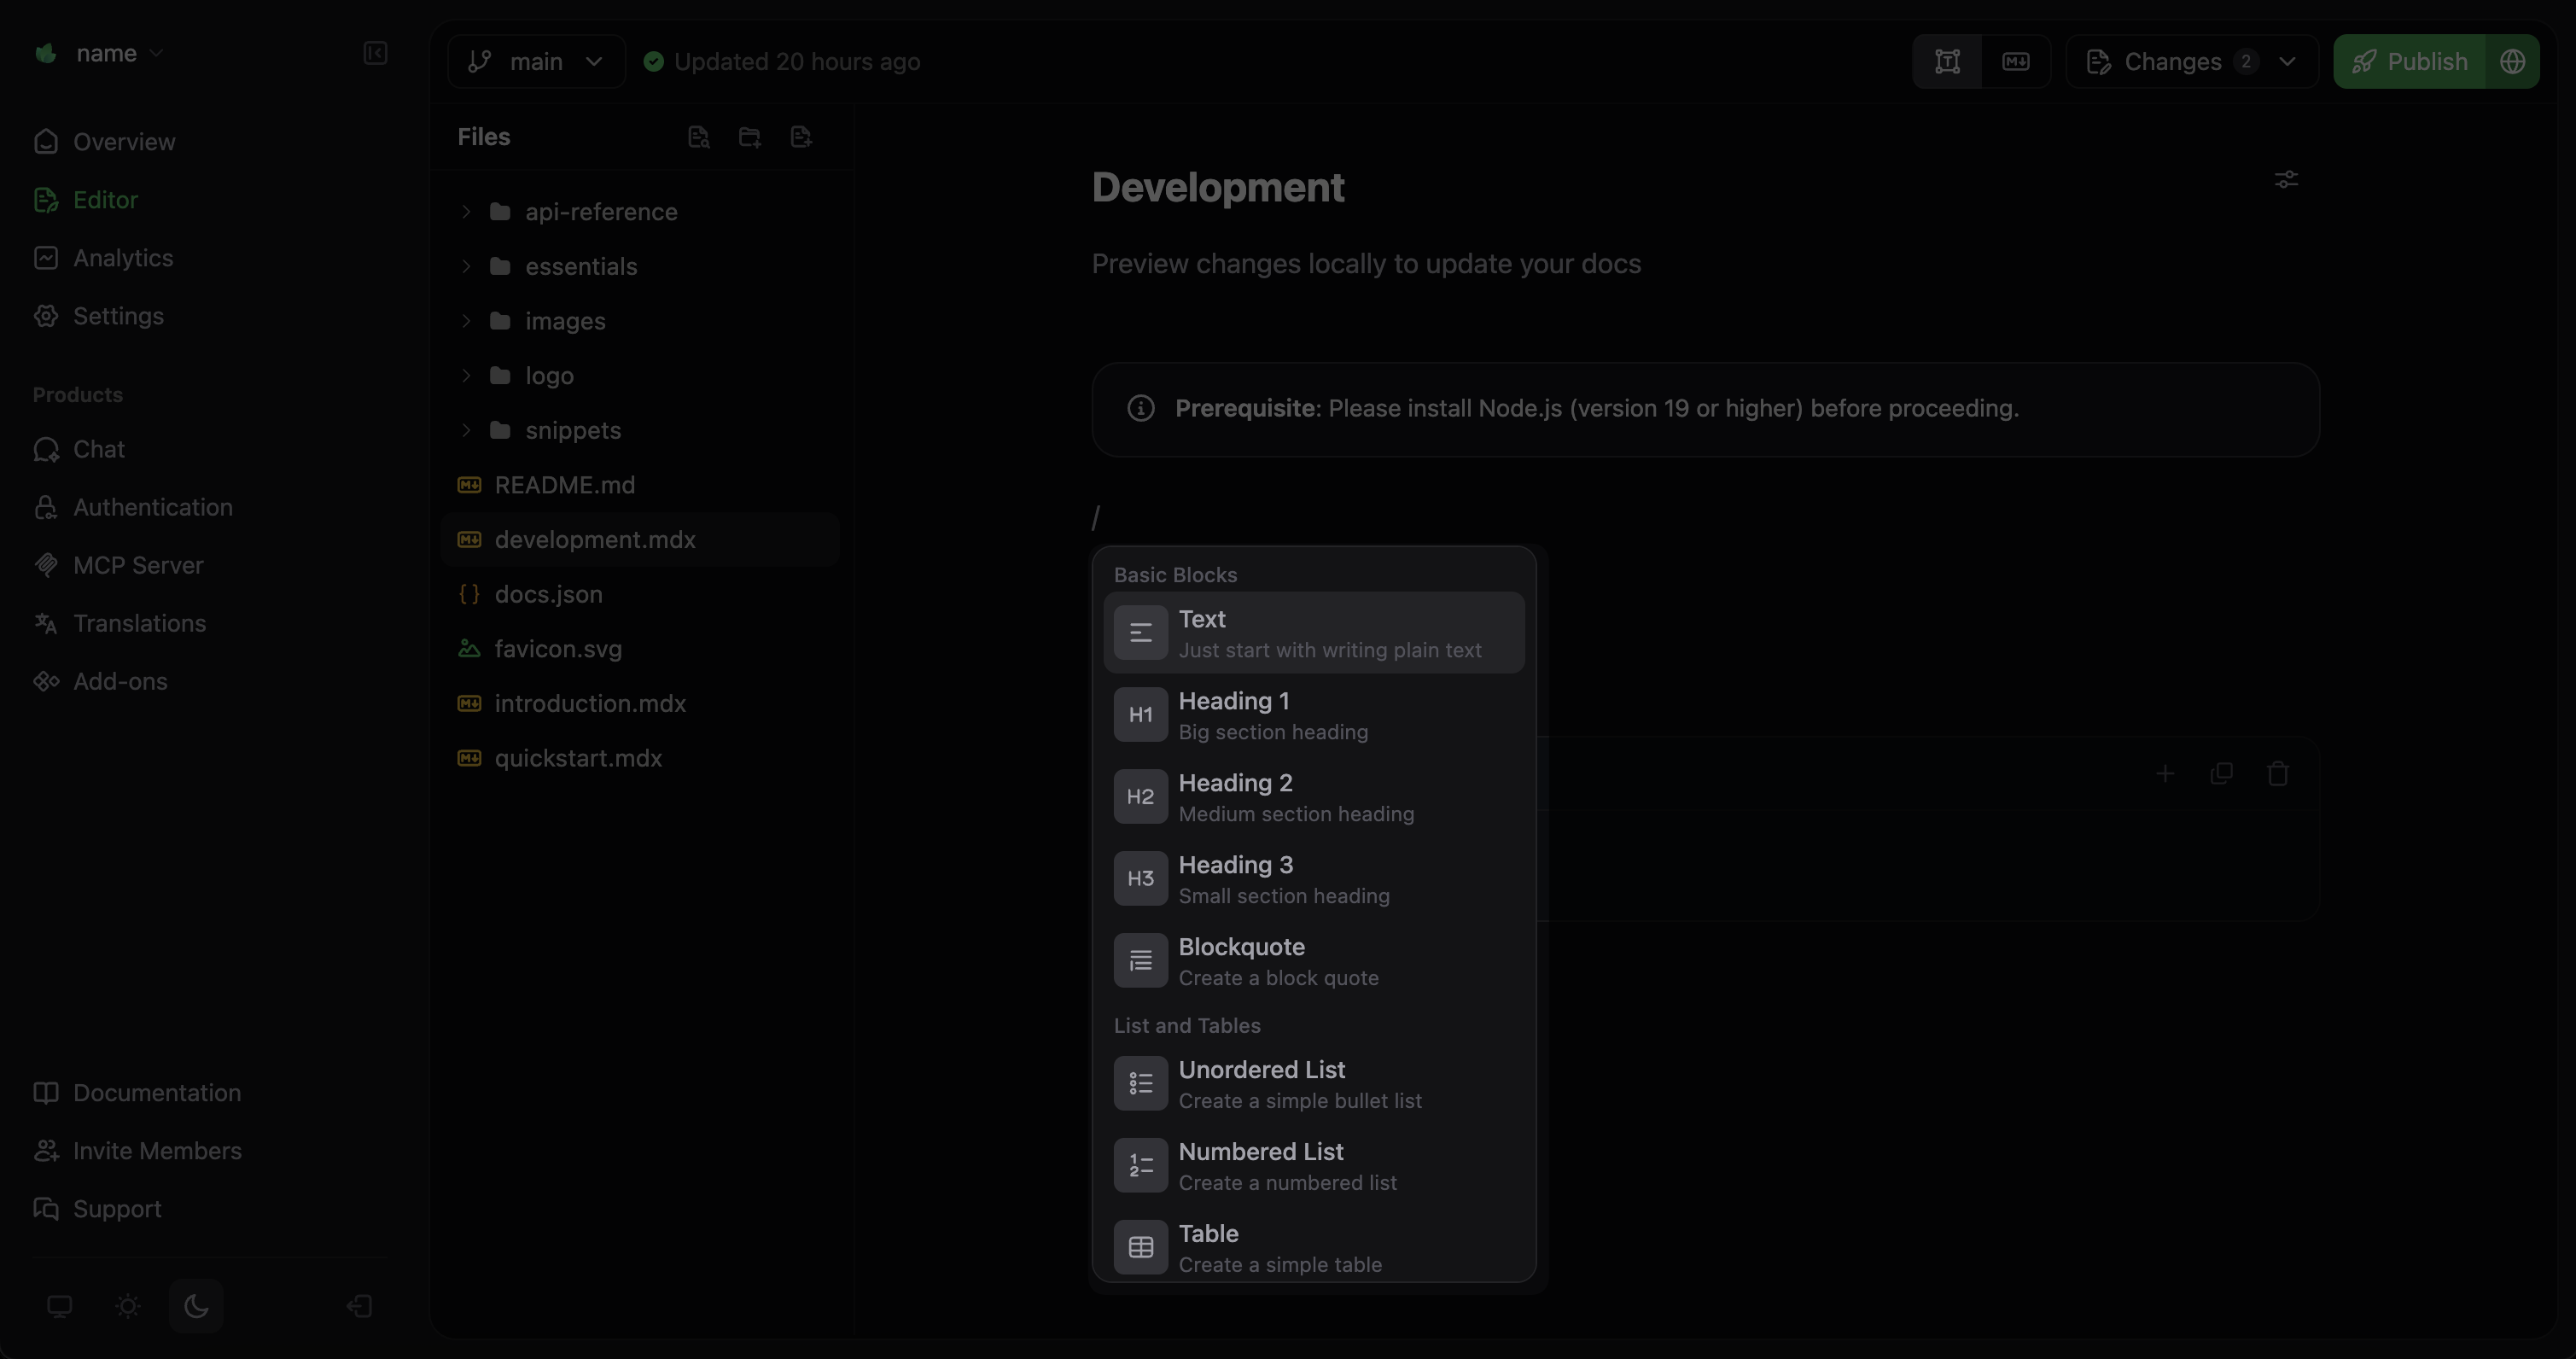
In visual mode, press / to open the dropdown component menu. Add content blocks, callouts, code blocks and other components to customize your documentation.
## Git fundamentals
The web editor performs Git operations behind the scenes. Understanding these concepts will help you work more effectively with the web editor and collaborate with team members who are working in their local environments.
Your documentation's source where all files and their history are stored. The web editor connects to your repository to access and modify content.
A saved snapshot of your changes at a specific point in time.
A separate workspace for making changes without affecting your live documentation. Think of it as a safe sandbox for experiments and larger updates.
The main branch that contains your live documentation content. Changes to this branch are automatically published to your documentation site. Often called `main`.
A way to propose merging your branch changes into your live documentation. Allows for review and discussion before changes go live. Commonly called a PR.
A diff (or difference) shows the specific changes between two versions of a file. When reviewing pull requests, diffs highlight what has been added, removed, or modified.
### What the web editor automates
The web editor connects to your Git repository through our [GitHub App](/settings/github) or [GitLab integration](/settings/gitlab) and handles Git automatically. When you:
* **Open a file**: Fetches the latest version from your repository.
* **Make changes in a file**: Tracks your changes as a draft that can become a commit.
* **Save changes**: Creates a commit with your changes.
* **Create a branch**: Creates a new branch in your repository.
* **Publish on your deployment branch**: Creates a commit and pushes directly to your deployment branch.
* **Publish on other branches**: Creates a commit and opens a pull request.
### When to use branches
Branches let you work on changes without affecting the content on your live site. When your changes are ready, you can merge them into your deployment branch with a pull request.
**Best practice: Always work from branches.** This ensures your live documentation stays stable and enables proper review workflows.
## Creating a branch
1. Select the branch name in the editor toolbar (usually `main` by default).
2. Select **New Branch**.
3. Enter a descriptive name for your branch like `update-getting-started` or `fix-installation-steps`.
4. Select **Create Branch**.
You may need to select your new branch from the dropdown menu if the editor does not automatically switch to it.
### Saving changes on a branch
To save your changes on a branch, select the **Save Changes** button in the top-right corner of the editor. This creates a commit with your changes and pushes it to your branch.
### Switching branches
1. Select the current branch name in the editor toolbar.
2. Select the branch you want to switch to from the dropdown menu.
Any unsaved changes will be lost when switching branches. Make sure to save or publish your work before switching.
## Making changes
Edit existing content, create new pages, and organize your site structure in the web editor.
### Navigating files
Use the sidebar file explorer to browse your documentation, or press Command + P (Ctrl + P on Windows) to search for files.
### Editing content
Make changes to your pages using visual mode or Markdown mode.
In visual mode, press / to open the dropdown component menu. Add content blocks, callouts, code blocks and other components to customize your documentation.
 ### Creating new pages
1. Select the **Create a new file** icon in the file explorer.
### Creating new pages
1. Select the **Create a new file** icon in the file explorer.

 1. Enter a filename.
2. Press Enter to create the file.
Your new page will open in the editor, ready for content to be added.
### Updating navigation
Add, remove, and reorder pages in your navigation by editing your `docs.json` file:
1. Navigate to your `docs.json` in the file explorer.
2. Update the `navigation` property to get the navigation structure that you want. See [Navigation](/navigation) for more information.
This example shows how to add a Themes page to the Profile group.
```json title="Adding a Themes page" highlight="18"
{
"navigation": {
"groups": [
{
"group": "Getting started",
"pages": [
"index",
"quickstart",
"installation"
]
},
{
"group": "Profile",
"pages": [
"settings",
"account-types",
"dashboard",
"themes"
]
}
]
}
}
```
## Publishing changes
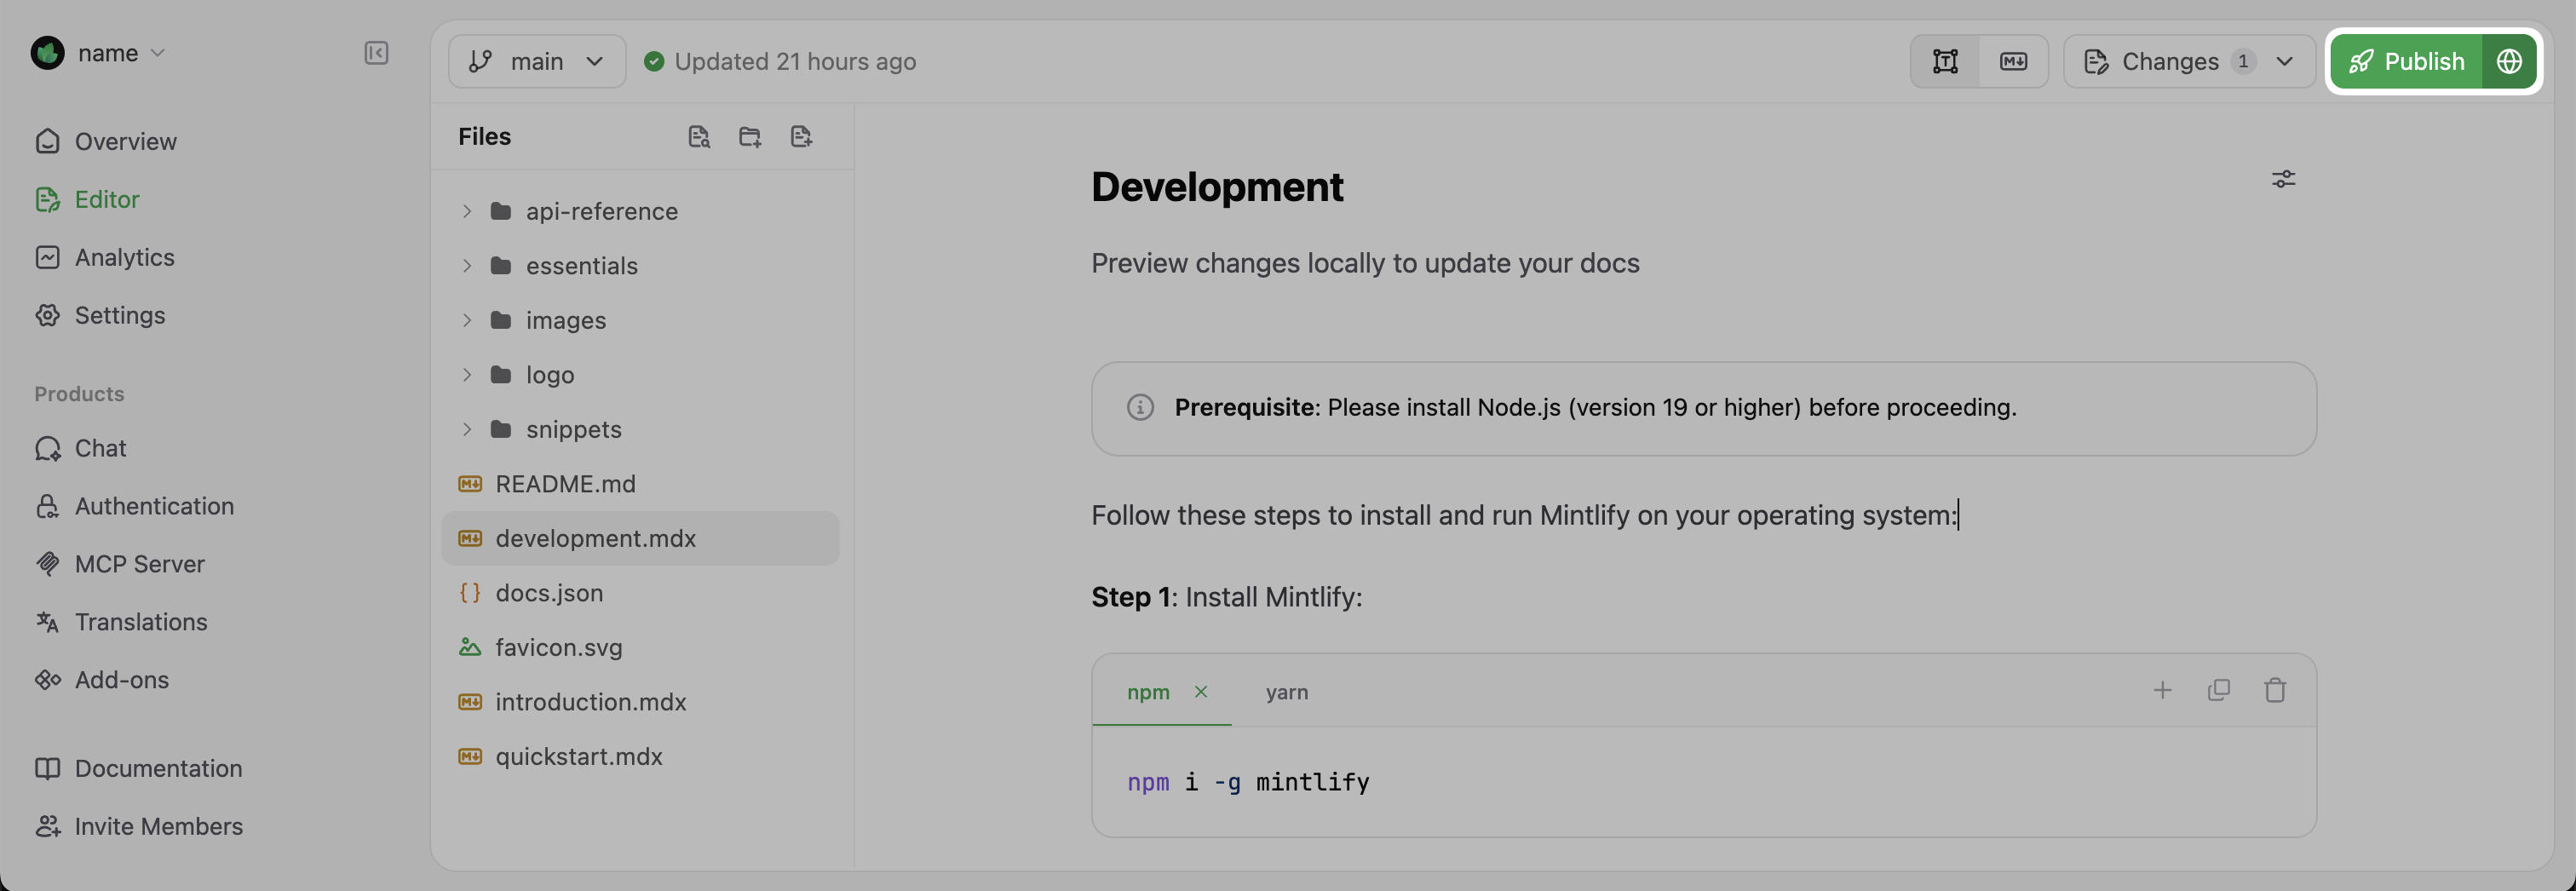
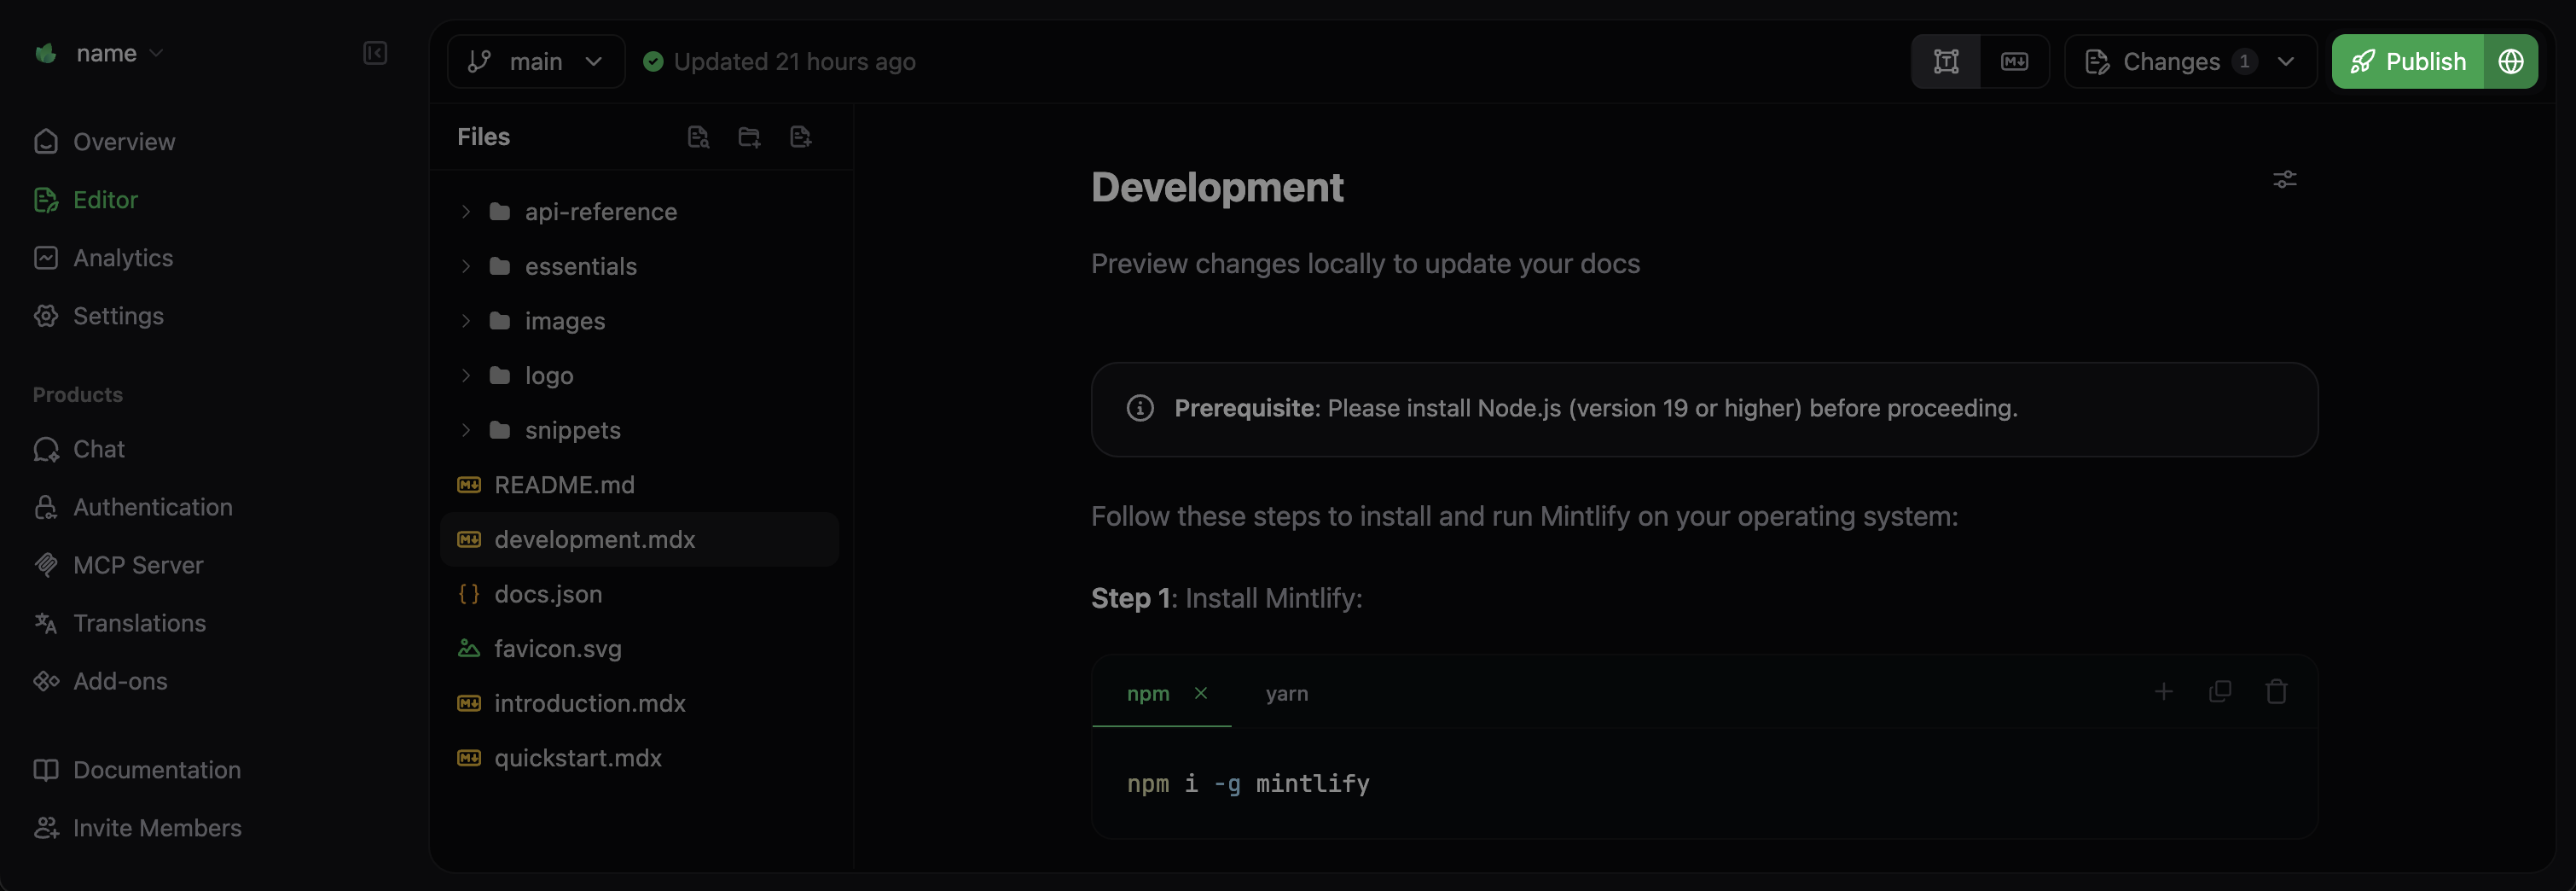
Select the **Publish** button to save your changes and make them available.
How your changes are published depends on which branch you are working on:
* **Deployment branch**: Updates your live site immediately.
* **Other branches**: Creates a pull request so you can review changes before they go live.
1. Enter a filename.
2. Press Enter to create the file.
Your new page will open in the editor, ready for content to be added.
### Updating navigation
Add, remove, and reorder pages in your navigation by editing your `docs.json` file:
1. Navigate to your `docs.json` in the file explorer.
2. Update the `navigation` property to get the navigation structure that you want. See [Navigation](/navigation) for more information.
This example shows how to add a Themes page to the Profile group.
```json title="Adding a Themes page" highlight="18"
{
"navigation": {
"groups": [
{
"group": "Getting started",
"pages": [
"index",
"quickstart",
"installation"
]
},
{
"group": "Profile",
"pages": [
"settings",
"account-types",
"dashboard",
"themes"
]
}
]
}
}
```
## Publishing changes
Select the **Publish** button to save your changes and make them available.
How your changes are published depends on which branch you are working on:
* **Deployment branch**: Updates your live site immediately.
* **Other branches**: Creates a pull request so you can review changes before they go live.
 ## Pull requests and reviewing changes
Pull requests let you propose changes from your branch so that other people can review them before merging into your live documentation. This helps ensure that your changes are correct and gives your team a chance to collaborate on content.
Even if you're working solo, pull requests are valuable for previewing changes before they go live and maintaining a clear history of updates.
### Creating a pull request on a branch
When you're ready to publish changes from your branch:
1. Make sure all your changes are saved on your branch.
2. Select **Publish Pull Request** in the top-right corner of the editor.
3. Add a title and description for your pull request. A good title and description help reviewers understand the changes you've made.
4. Select **Publish Pull Request**.
## Pull requests and reviewing changes
Pull requests let you propose changes from your branch so that other people can review them before merging into your live documentation. This helps ensure that your changes are correct and gives your team a chance to collaborate on content.
Even if you're working solo, pull requests are valuable for previewing changes before they go live and maintaining a clear history of updates.
### Creating a pull request on a branch
When you're ready to publish changes from your branch:
1. Make sure all your changes are saved on your branch.
2. Select **Publish Pull Request** in the top-right corner of the editor.
3. Add a title and description for your pull request. A good title and description help reviewers understand the changes you've made.
4. Select **Publish Pull Request**.
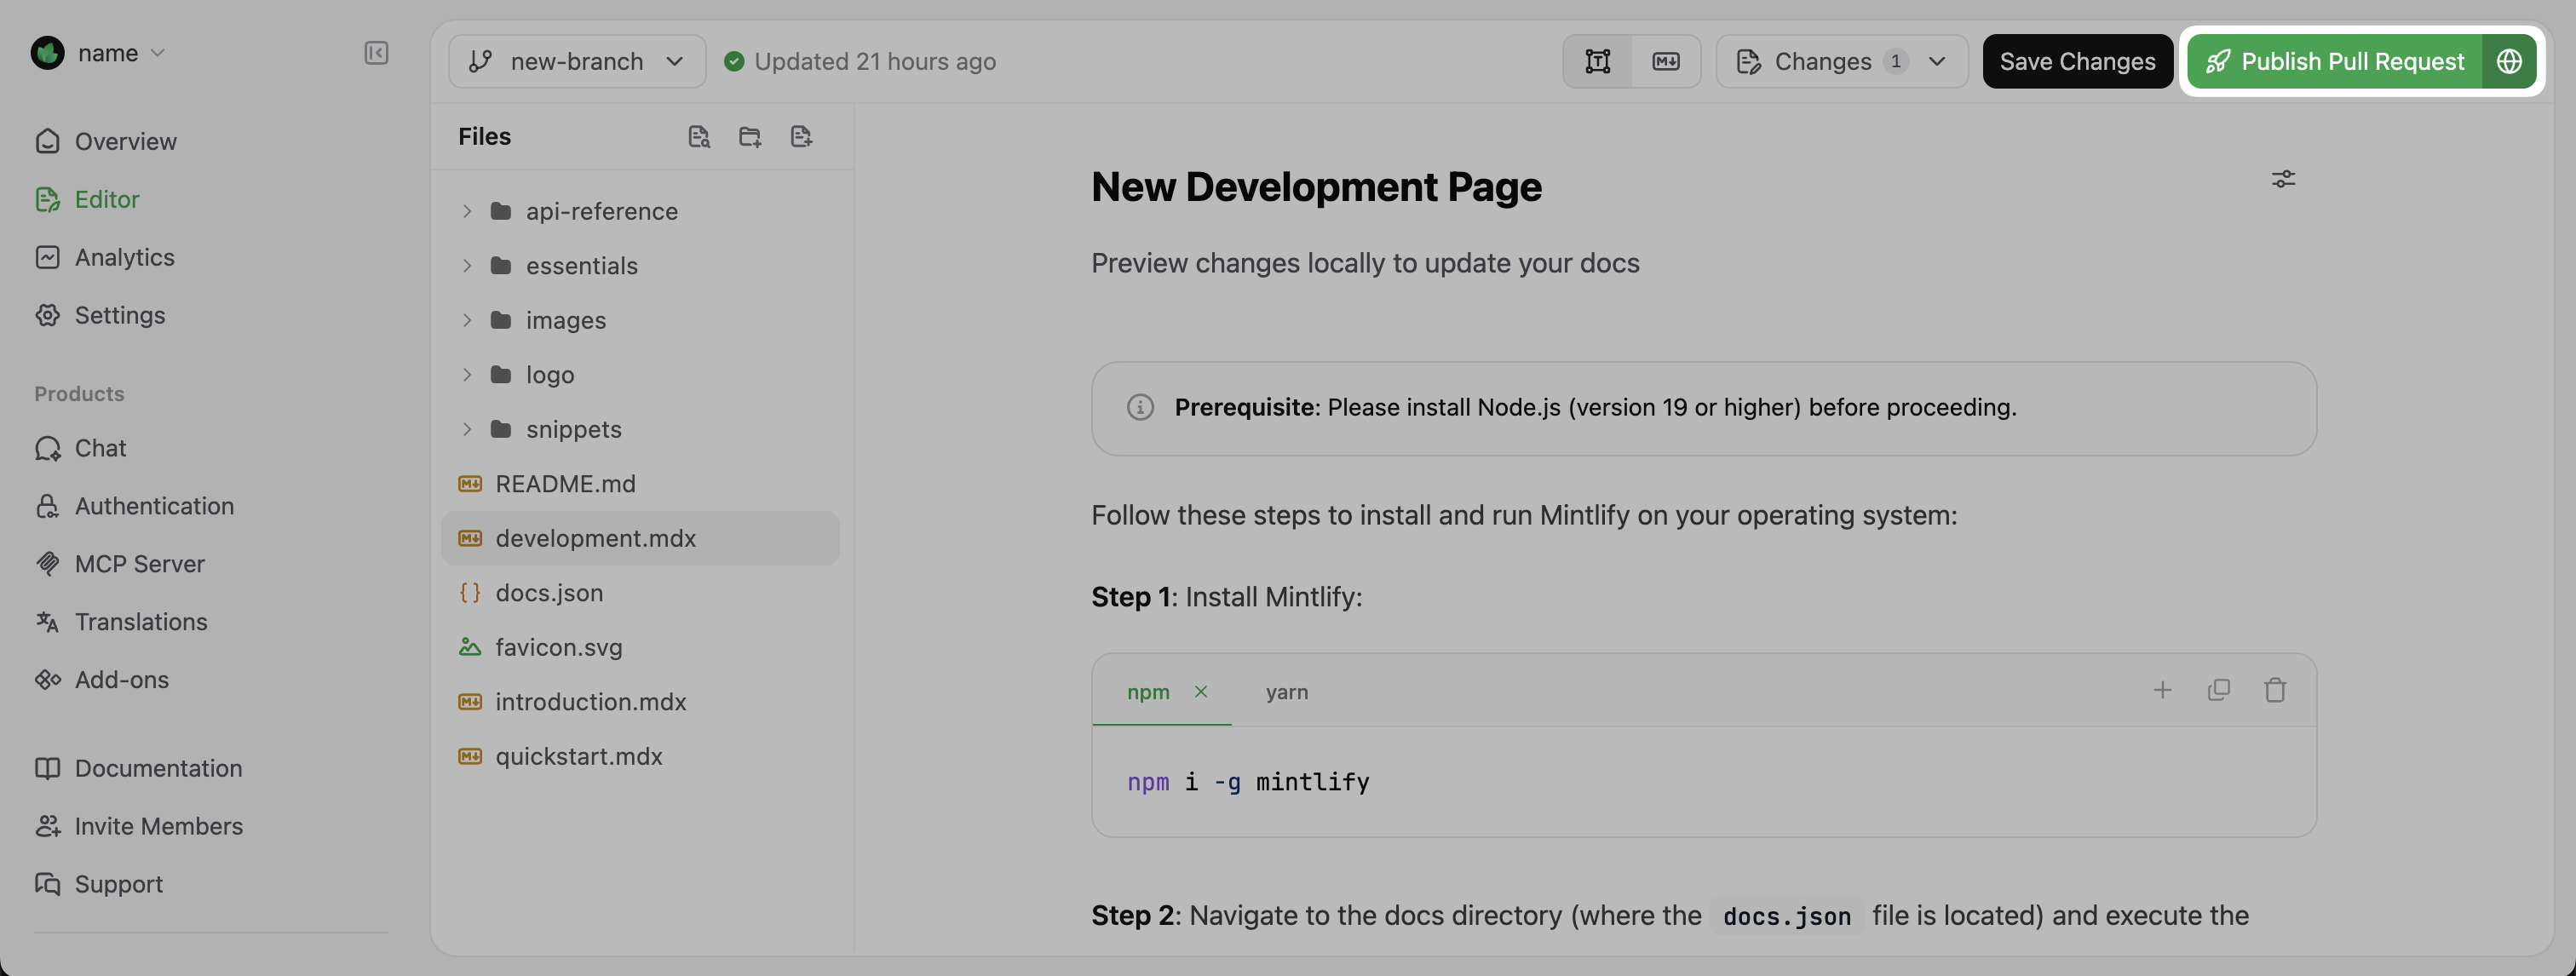
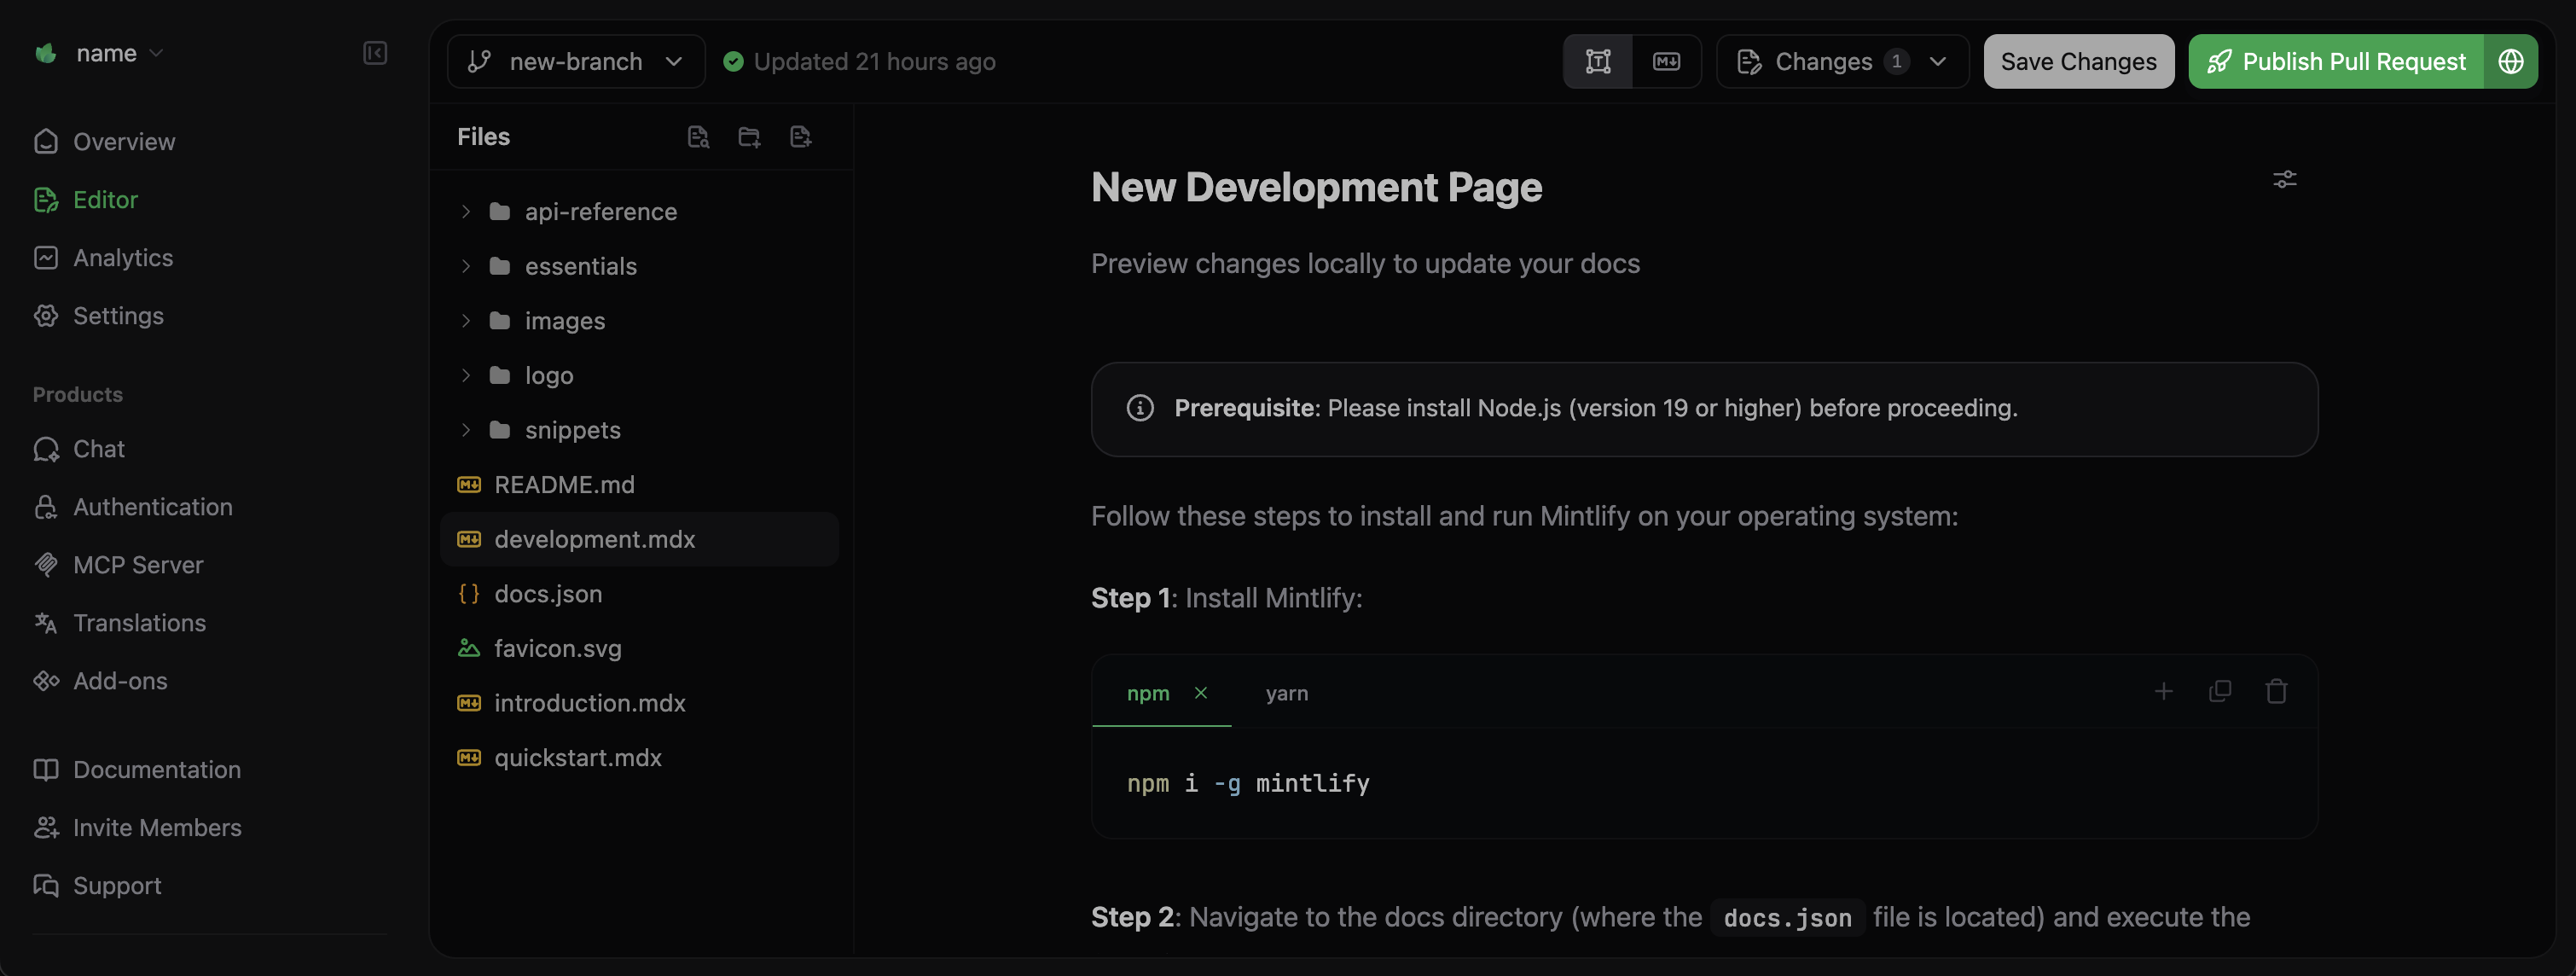 The web editor will create a pull request in your Git repository and provide a link to view it.
### Reviewing pull requests
Once your pull request is created:
1. **Review your changes**: You and your team members can review your pull request in your Git provider like GitHub or GitLab.
2. **Make additional changes**: After reviewing, make any changes in your web editor. Saving your changes will update your pull request.
3. **Merge when ready**: When your pull request is ready, merge it to deploy changes to your live documentation site.
## Troubleshooting
Here are solutions to common issues you might encounter with the web editor.
**Possible causes:**
* Deployment is still in progress
* Caching issues in your browser
**Solutions:**
1. Check deployment status in your Mintlify Dashboard.
2. Try hard refreshing your browser (Ctrl + F5 or Cmd + Shift + R).
3. Clear your browser cache.
**Possible causes:**
* Insufficient permissions to the Git repository
* Authentication issues with your Git provider
**Solutions:**
1. Verify you have correct access to the repository.
2. Check if your Git integration is properly configured.
3. Review the [Editor Permissions](/advanced/dashboard/permissions) documentation.
**Possible causes:**
* Network connectivity problems
* Large documentation repositories
**Solutions:**
1. Check your internet connection.
2. Refresh the page and try again.
3. Contact support if the issue persists.
The web editor will create a pull request in your Git repository and provide a link to view it.
### Reviewing pull requests
Once your pull request is created:
1. **Review your changes**: You and your team members can review your pull request in your Git provider like GitHub or GitLab.
2. **Make additional changes**: After reviewing, make any changes in your web editor. Saving your changes will update your pull request.
3. **Merge when ready**: When your pull request is ready, merge it to deploy changes to your live documentation site.
## Troubleshooting
Here are solutions to common issues you might encounter with the web editor.
**Possible causes:**
* Deployment is still in progress
* Caching issues in your browser
**Solutions:**
1. Check deployment status in your Mintlify Dashboard.
2. Try hard refreshing your browser (Ctrl + F5 or Cmd + Shift + R).
3. Clear your browser cache.
**Possible causes:**
* Insufficient permissions to the Git repository
* Authentication issues with your Git provider
**Solutions:**
1. Verify you have correct access to the repository.
2. Check if your Git integration is properly configured.
3. Review the [Editor Permissions](/advanced/dashboard/permissions) documentation.
**Possible causes:**
* Network connectivity problems
* Large documentation repositories
**Solutions:**
1. Check your internet connection.
2. Refresh the page and try again.
3. Contact support if the issue persists.